Last Updated: May 20, 2026

TL;DR: An aquarium stand bracket reinforces tank stands, wall-mounts, and canopy connections — critical for tanks over 40 gallons where structural failure means hundreds of gallons on your floor. This guide covers bracket types, load ratings, and installation best practices.
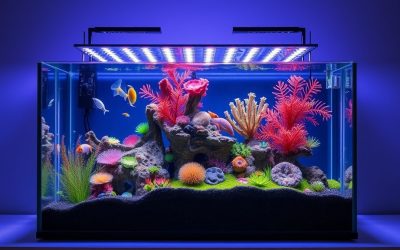
Aquarium Stand Bracket: Structural Support Guide for Heavy Tank Builds
A fully loaded 75-gallon aquarium weighs over 800 pounds. The aquarium stand bracket system holding that weight isn’t something to improvise. Whether you’re reinforcing a commercial stand, building a custom cabinet, or wall-mounting a shallow reef display, understanding bracket selection and installation is essential for long-term safety.
This guide covers the bracket types used in aquarium stand builds, how to spec them correctly, and installation principles that keep your stand rigid under dynamic load.
Quick answer: Our top pick in 2026 is the Corner bracket (L-bracket) — our #1 rated choice. See the full ranked comparison, alternatives and buying advice below.
Why Aquarium Stands Need Proper Bracketing
Water is heavy — roughly 8.34 lbs per gallon. A 100-gallon tank with substrate, rock, and equipment easily exceeds 1,000 lbs of static load. But aquarium stands also carry dynamic loads: vibration from pumps, water movement, and the occasional bump. Without proper corner and cross-bracing, even strong-looking stands can rack over time, leading to wood joint failure and catastrophic collapse.
Commercial aquarium stands are engineered for specific tank sizes. When hobbyists modify stands, add sump cutouts, or DIY a stand for a non-standard tank, proper bracketing becomes non-negotiable.
Aquarium Stand Bracket Types and Applications
| Bracket Type | Application | Material | Load Capacity |
|---|---|---|---|
| Corner bracket (L-bracket) | Joint reinforcement at 90-degree corners | Steel, stainless | 200–800 lbs per pair |
| Flat mending plate | Reinforcing mid-span wood joints | Steel, zinc-plated | Varies by fastener count |
| T-bracket | Three-way junction reinforcement | Steel | Moderate — best with lag bolts |
| Gusset bracket | Diagonal racking prevention | Steel, heavy-gauge | High — critical for tall stands |
| Wall-mount bracket | Anchoring stand to wall studs | Steel, rated | Stud-rated; use 3/8″ lag bolts |
| Canopy hinge/support bracket | Overhead light canopy attachment | Aluminum, steel | Low load — lateral stability |
Top Aquarium Stand Bracket Products
These three picks cover corner reinforcement for DIY wood stands, heavy-duty wall-mounting brackets, and canopy support hardware.


As an Amazon Associate we earn from qualifying purchases. Product prices and availability are accurate as of the date/time indicated.


As an Amazon Associate we earn from qualifying purchases. Product prices and availability are accurate as of the date/time indicated.


As an Amazon Associate we earn from qualifying purchases. Product prices and availability are accurate as of the date/time indicated.
How to Spec Brackets for Your Tank Weight
Start with total loaded tank weight: tank weight + water (gallons x 8.34 lbs) + substrate (gravel is roughly 100 lbs per cubic foot) + rock + equipment. For a reef build, add 1.5x safety factor to account for dynamic loads and future additions.
Distribute that load across the number of support points (legs or corner posts). A standard 4-leg stand under a 900-lb loaded 100-gallon tank puts 225 lbs per corner at minimum. Your corner brackets must be rated for that load at the fastener pattern you’re using, not just the bracket’s theoretical maximum.
For wall-mounting any tank over 30 gallons, always anchor into wall studs — not drywall anchors. Minimum 3/8-inch lag bolts into studs for tanks over 50 gallons. Consult a structural engineer if mounting tanks over 100 gallons to wall framing — stud bays aren’t always rated for the eccentric loading a large tank creates.
DIY Stand Bracketing Best Practices
For plywood and lumber stands (the most common DIY approach), use 3/4-inch plywood for all vertical panels with corner glue joints reinforced by internal L-brackets on every corner. The top frame supporting the tank must be continuous — no gaps or unsupported spans under the tank footprint, since aquarium glass and acrylic require uniform support across their full perimeter.
Add a diagonal gusset bracket in the back panel interior to prevent racking — this is the most overlooked structural element in DIY stands. Without diagonal bracing, a stand can shift laterally over months and years, especially with vibration from pumps and powerheads.
All hardware in a wet environment should be stainless steel (grade 316 for marine applications) or hot-dip galvanized. Regular zinc-plated hardware corrodes within months in high-humidity aquarium environments and loses structural integrity rapidly.
For complete aquarium build planning, see our guides on sump setup and cabinet design, building a DIY aquarium stand from scratch, and full aquarium setup checklist.
Frequently Asked Questions
What size L-bracket do I need for a 75-gallon aquarium stand?
For a standard wood stand supporting a 75-gallon tank (approximately 800 lbs loaded), use heavy-duty L-brackets rated for at least 300 lbs per corner with a minimum of 4 fastener holes. 3-inch x 3-inch brackets with 3/8-inch pre-drilled holes are a standard spec for this application. Use structural screws (not drywall screws) rated for wood joinery — #12 x 2.5-inch wood screws minimum, or 1/4-inch lag bolts for critical joints.
Can I wall-mount a 40-gallon aquarium with standard brackets?
A loaded 40-gallon tank weighs roughly 400–450 lbs. Wall mounting requires brackets rated for this load at a cantilevered distance (the tank projects out from the wall, creating significant torque). Standard shelf brackets are not appropriate — you need specifically rated aquarium wall-mount brackets or custom steel angle iron welded to a wall plate. Always mount into studs, never drywall alone, and use minimum 3/8-inch lag bolts 3 inches into stud material.
How do I stop my aquarium stand from wobbling on uneven floors?
Adjustable leveling feet are the correct solution — not shimming with cardboard or folded paper. Leveling feet with rubber pads distribute load evenly and can be adjusted precisely. For concrete or tile floors, use rubber anti-vibration pads under each foot. For wood floors, ensure the stand spans at least 2 floor joists — avoid placing the full load on a single joist run. Check level monthly during the first year as the floor adjusts to the constant load.
What type of screws should I use to assemble an aquarium stand in a wet environment?
Use 316 stainless steel screws for any hardware inside a sump cabinet or anywhere exposed to splashes and humidity. For exterior visible hardware, 304 stainless works in freshwater environments. Avoid standard zinc-plated hardware entirely for aquarium applications — it corrodes and stains quickly in high-humidity conditions and can leach zinc into the water supply if submerged. For structural wood-to-wood joints, exterior-grade structural screws with ACQ-rated coating are an acceptable lower-cost alternative to full stainless.
Do I need to anchor my aquarium stand to the wall for safety?
In earthquake-prone regions, yes — wall anchoring is strongly recommended for tanks over 30 gallons. Even outside seismic zones, anchoring a tall stand (sump cabinet designs are often 36+ inches tall) dramatically improves tip resistance. A simple 2-inch angle bracket from the top rear of the stand into a wall stud provides significant racking and tip resistance with minimal installation effort. Use earthquake straps designed for the purpose — they’re inexpensive and rated for this application.
Ready to decide? Our #1 pick for 2026 is the Corner bracket (L-bracket).
Live price & availability on Amazon.
Related Reviews & Guides


Quick Picks: Aquarium Light Timer Controller Auto

Best Aquarium Water Hardness Test Kits (GH & KH)