Last Updated: October 21, 2026
- Top Pick: My First Fish Tank: The Complete Freshwater Aquarium Beginner’s Guide: Step-by-Step Setup, Water Chemistry Made Simple, and Easy Fish Care to Build a Thriving Tank
- Best Value: METYERRY 40-50 Gallon Fish Tank Stand with Power Outlet,Adjustable Shelf
- Premium Choice: Aquascaping: A Step-by-Step Guide to Planting, Styling, and Maintaining Beautiful Aquariums
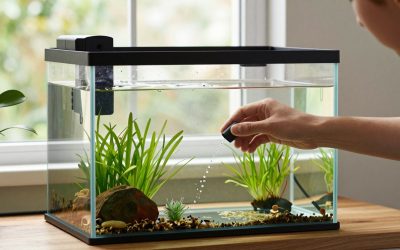
Fish tank setup step by step takes an afternoon of assembly and then several weeks of waiting, and the waiting is the part that decides whether the fish survive. This is what the tank is doing during those weeks, what each test reading means at the time, and the point at which it becomes genuinely safe to stock.
As an Amazon Associate we earn from qualifying purchases.
As an Amazon Associate we earn from qualifying purchases at no extra cost to you.







By David Nguyen
Fish Tank Setup Step by Step: The Timeline and What Drives It
The schedule of a new tank is set by bacterial growth, not by how quickly the hardware goes together. Two colonies have to establish themselves in sequence, and that sequence takes three to eight weeks regardless of how carefully the substrate was rinsed or how clear the water looks.
The Decision Numbers Before the Timeline Starts
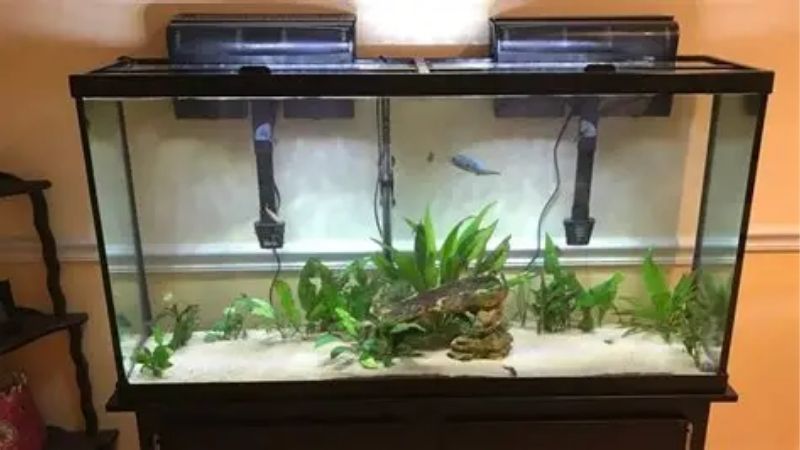
Record capacity in US gallons and litres, footprint in inches and centimetres, and filled weight at roughly 10 lb per gallon (about 1 kg per litre) plus substrate and rock. A 29 gallon (110 L) tank reaches about 330 lb (150 kg), which decides where in the house it is allowed to stand.
The gear list is short and fixed: filter, heater, chloramine-rated conditioner, thermometer and a liquid test kit. Measure the stand length, the gap behind the tank, the cabinet height and the floor rating before ordering anything, because none of it can be adjusted once the tank is full.
Why the Wait Is Measured in Weeks
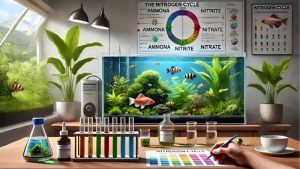
Waste breaks down into ammonia, one group of bacteria converts that ammonia into nitrite, and a second group converts nitrite into nitrate. The second group grows more slowly than the first, which is why nitrite typically peaks well after ammonia has started falling in a new tank.
Bacterial mass grows in response to a steady food supply, so the colony can only expand as fast as ammonia is supplied and consumed. Warmth at 78 to 82 F (26 to 28 C), strong aeration and seeded media from a mature filter all speed this up, but none of them remove the growth period.
What the Readings Should Look Like at Each Stage
Early on, ammonia is high and nitrite is zero. In the middle weeks, ammonia falls while nitrite climbs and can read off the top of the chart. At the end, both sit at zero within 24 hours of dosing and nitrate accumulates, which is the only combination that actually confirms a working filter.
Thresholds for a stocked tank are stricter still: take action above 0.25 ppm ammonia and at any nitrite reading above zero, and hold nitrate under 20 to 40 ppm. A liquid master test kit makes this timeline legible, and reagents expire, so check the printed date on the box before use.
| Week | What is happening | Expected readings | What you do |
|---|---|---|---|
| Day 1 | Hardware assembled, tank filled and treated | Ammonia 0, temperature settling | Level the stand, run equipment 24 hours |
| Week 1 | First bacteria colonising media | Ammonia 2 to 4 ppm, nitrite 0 | Dose ammonia, hold 78 to 82 F (26 to 28 C) |
| Weeks 2 to 3 | Ammonia converting, nitrite rising | Ammonia falling, nitrite 1 to 5 ppm | Keep dosing, avoid water changes |
| Weeks 4 to 6 | Second colony catching up | Nitrite falling, nitrate 10 to 40 ppm | Dose daily, test every 24 hours |
| Weeks 6 to 8 | Filter matured to the dosed load | 0 ammonia and 0 nitrite in 24 h | Large water change, add first small group |
How the Timeline Changes for Your Tank
The eight-week outline assumes a moderately sized tropical tank in a heated room. Fish tank setup step by step looks different at each end of the volume range and changes again with stocking plans, so the schedule below is a baseline to adjust rather than a fixed calendar to obey.
Tank Size, Placement, and Fit
Rated volume overstates the water: a 20 gallon (76 L) tank holds roughly 17 to 18 gallons (64 to 68 L) once substrate, hardscape and the rim gap are subtracted, and ammonia dosing during cycling should be calculated on that smaller figure to avoid overshooting the target concentration badly.
Placement affects the timeline directly. A tank in direct sun grows algae during the cycle itself, a spot beside a vent swings temperature and slows bacterial growth, and a position far from a tap makes the large water change at the end of the cycle tedious enough that people quietly postpone it.
How 10, 20, and 55 Gallon Tanks Differ in Practice
Small tanks reach their target ammonia concentration with tiny doses, which makes overdosing easy and stalls the cycle when levels climb past about 5 ppm. Larger tanks are more forgiving on dosing but slower to change temperature, so they respond gradually to any correction you make.
Stability after stocking runs the other way around. A 55 gallon (208 L) tank absorbs a missed water change or an overfeed with far less movement in ammonia than a 10 gallon (38 L), which is why bigger tanks suit beginners despite the higher cost and the heavier weekly water volume.
How Stocking Plans Change the Schedule
Cycle to the load you intend to keep, not to an arbitrary number. A tank destined for goldfish or cichlids needs a larger bacterial colony and eight to ten turnovers per hour, so it should be dosed toward the upper end and stocked more slowly than a lightly stocked community tank.
Group species arrive in sixes, which is a step change in bioload rather than a gradual one. Add one group, wait two to three weeks while testing twice weekly, then add the next, because the filter colony has to grow again every time the amount of waste entering it increases by a step.
Mistakes That Break the Timeline
Most stalled cycles come from three beliefs that feel like diligence at the time. Working through fish tank setup step by step means resisting all three, because each one removes either the bacteria or the ammonia that the process depends on, and both are invisible without a test kit.
Myth: Clear Water Means the Tank Is Ready
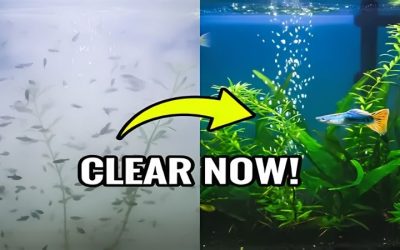
Clarity measures suspended particles and nothing else. Ammonia and nitrite are both colourless and odourless at lethal concentrations, so a tank can look immaculate on day three while holding readings that damage gill tissue. Only a test result distinguishes clean-looking water from safe water.
The reverse is also true. A white haze in week one is usually a harmless bacterial bloom feeding on dissolved organics, and it clears as the system matures. Test first, cut feeding back, and leave clarifying products alone, since they treat the appearance rather than the underlying cause.
Myth: Cleaning More Often Speeds Things Up
Large water changes during cycling remove the ammonia the bacteria are feeding on, which slows the very process you are waiting for. Change water during the cycle only when nitrite is off the chart, and otherwise keep dosing and let the readings move at the pace they are going to move.
Rinsing filter media under the tap is the more damaging version of the same instinct, because chlorine and chloramine kill nitrifying bacteria on contact. Rinse mechanical media in a bucket of old tank water and replace one layer at a time so the colony always has somewhere to live.
Myth: Once Cycled, You Can Stock All at Once
A cycled filter is sized to the ammonia it has been receiving, not to whatever arrives next. Adding a full stocking list in one afternoon can outpace the colony and produce a fresh ammonia reading within days, which is a mini-cycle happening in a tank that was genuinely ready yesterday.
Add one small group, then wait two to three weeks and test twice weekly before the next. The same rule applies after any large media change, after a long power cut, and after returning from a holiday during which somebody else was handling the feeding, since all three shrink the colony.
After Week Eight: Maintenance, Wear and Running Costs
Finishing fish tank setup step by step is the beginning of an operating schedule rather than the end of a project. The tank now runs continuously, and the components inside it wear at predictable rates that quietly change the readings if nobody is checking them from time to time.
The Routine That Keeps the Cycle Stable
Change 20 to 30 percent weekly, adjusted by measured nitrate rather than by the calendar, matching temperature to within 1 to 2 F (about 1 C) and treating for chloramine before the water goes in. Rinse mechanical media monthly in old tank water and check the impeller while it is out.
Travel is the routine risk to plan around. A tank left for a week or two loses water to evaporation, concentrates nitrate and depends on whoever is feeding, so the safest arrangement is pre-portioned food, a written note about quantities, and topping up with treated water on return.
What Degrades, and Roughly When
Heaters drift from the dial and can run 2 to 4 F (1 to 2 C) out within a year, and they fail either stuck on or completely dead, which is why an independent thermometer belongs in every tank. Impellers wear, seals harden, and airstones clog until the pump works harder for less flow.
Filters lose flow gradually, and the GPH printed on the box is a no-load figure that drops 30 to 50 percent once media and hoses are fitted. Summer adds its own load, since a tank drifting past 84 F (29 C) holds less dissolved oxygen and pushes fish toward the surface to breathe.
Recurring Costs After the First Two Months
The ongoing spend is conditioner, food, filter floss, replacement test reagents and electricity for a heater, filter and light that never switch off. Winter raises the heater share considerably, since a room sitting 10 F (6 C) below target keeps the element running for much longer each day.
Filter design decides the rest. Proprietary cartridges must be bought on a schedule and discard live bacteria at every swap, while bulk filter floss lets you keep the established colony and replace only the mechanical layer. Prices move constantly, so check them at the time you actually buy.
Frequently Asked Questions
These are the questions that come up midway through a fish tank setup step by step, when the hardware is running and nothing visible seems to be happening at all. Each answer is tied to a reading, because the readings are the only reliable signal of progress during those middle weeks of the process.
How do I know the cycle is finished?
Dose ammonia to 2 ppm in the evening and test 24 hours later. Zero ammonia, zero nitrite and measurable nitrate means the filter is processing the full dose within a day. Anything short of that, including a faint trace of nitrite, means the colony is not yet large enough to carry fish.
Why has my cycle stalled halfway through?
Usually ammonia has climbed past roughly 5 ppm, pH has fallen with depleted KH, or the temperature has dropped. Check all three, dilute if ammonia is very high, and confirm the heater against a thermometer, since cold water slows bacterial growth substantially without stopping it.
Can I run the tank with plants during the cycle?
Yes, and it usually helps, since plants take up ammonia directly and arrive carrying useful bacteria. Expect some melting as they adapt, remove any decaying leaves promptly, and keep the photoperiod to six or eight hours so that the extra light does not simply produce a crop of algae instead.
What if I only have a few weeks before a holiday?
Start the cycle but do not stock before you leave. A tank still partway through a fish tank setup step by step tolerates a week alone, while a newly stocked one needs daily observation exactly when nobody is there. Resume dosing when you return home and stock only once the 24 hour test comes back completely clean.
See More:
Working Through the Timeline
Fish tank setup step by step is one afternoon of building followed by three to eight weeks of measured waiting, and every shortcut people take during that wait removes either the bacteria or the ammonia the process needs. The test result, not the appearance of the water, ends the wait.
Nothing in the timeline can be compressed by effort. The hardware is ready in an afternoon, and the filter is ready when a 2 ppm ammonia dose clears inside 24 hours, somewhere between week three and week eight. The only way to know which week that is, is to keep testing until it happens.
How to Speed Up Aquarium Cycling: What Works and What Fails
Fish Quarantine Tank Setup: Complete Beginner Guide