Last Updated: May 26, 2026

TL;DR: An aquarium CO2 bubble counter lets you monitor and dial in CO2 injection rates precisely — consistent bubble counts translate directly to stable pH and healthy plant growth. This guide covers how bubble counters work, where to install them, and how to read bubble rate against drop checker colour.
Aquarium CO2 Bubble Counter: Dialling In Your Injection Rate
CO2 injection is the single highest-leverage intervention in a high-tech planted tank — more impactful than fertiliser dosing, more important than lighting hours, more consequential than substrate choice. But CO2 without measurement is guesswork, and guesswork in CO2 management either starves your plants of the carbon they need or drives dissolved CO2 to levels that stress fish. An aquarium CO2 bubble counter is the instrument that turns guesswork into a repeatable, adjustable protocol.
The bubble counter serves two functions simultaneously. First, it lets you set a consistent injection rate by counting discrete bubbles per second passing through a water-filled chamber — a far more reliable reference point than estimating flow by sound or sight at the regulator needle valve. Second, when paired with a drop checker loaded with indicator solution, it creates a real-time feedback loop: adjust the bubble rate, observe the colour shift, and lock in the setting once the indicator reaches the target blue-green. That combination — bubble counter plus drop checker — is the practical CO2 monitoring system used by the vast majority of serious planted tank aquascapers.
How an Aquarium CO2 Bubble Counter Works
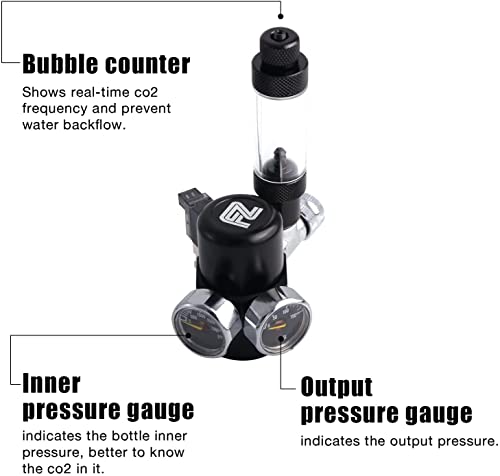
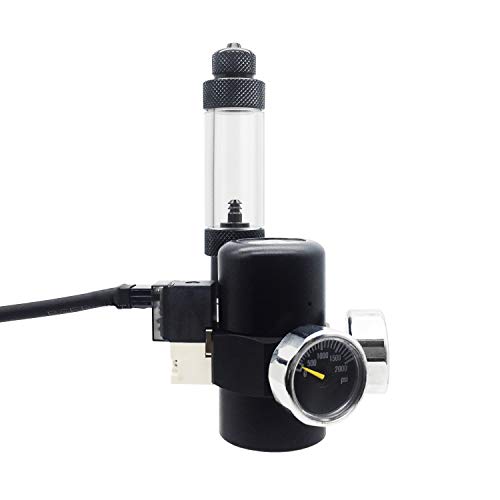
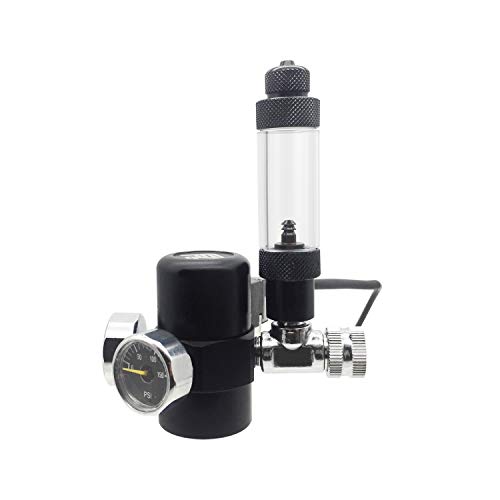
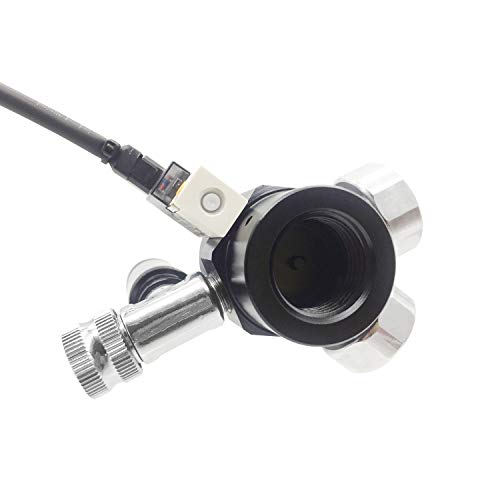
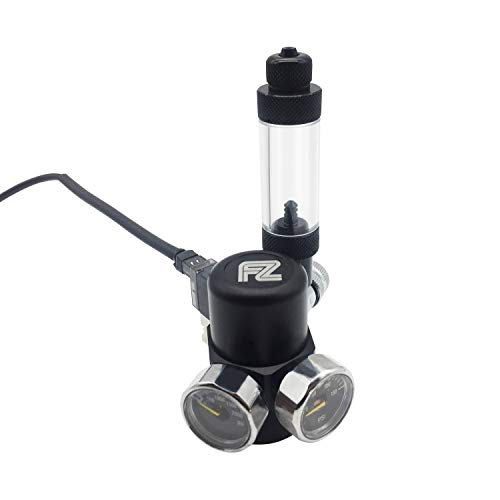
A bubble counter is a small inline or in-line chamber that attaches to the CO2 tubing between the regulator and the diffuser. The chamber is filled with water, and CO2 gas enters from the bottom and exits from the top as discrete bubbles that rise through the water column. Counting those bubbles — typically expressed as bubbles per second (BPS) or bubbles per minute (BPM) — gives you a consistent, measurable injection rate that you can reproduce exactly after tank maintenance, CO2 canister changes, or regulator adjustments.
In-line versions mount directly in the CO2 tubing run and are the cleaner aesthetic choice for visible equipment. Check-valve function is often built in — the water chamber prevents suck-back from pressurised diffusers or power outages from drawing tank water back into the regulator. Standalone versions clip to the tank rim or mount on the sump wall and connect via short tubing segments. Both types function identically for measurement purposes.
Top Aquarium CO2 Bubble Counter and Checker Picks


As an Amazon Associate we earn from qualifying purchases. Product prices and availability are accurate as of the date/time indicated.


As an Amazon Associate we earn from qualifying purchases. Product prices and availability are accurate as of the date/time indicated.

As an Amazon Associate we earn from qualifying purchases. Product prices and availability are accurate as of the date/time indicated.
Reading Bubble Rate: What Numbers Mean in Practice
Bubble rate alone does not determine dissolved CO2 concentration — diffuser efficiency, water surface agitation, tank volume, and plant biomass all affect how much injected CO2 actually dissolves and stays in solution. Bubble rate is a repeatable input reference, not a dissolved CO2 reading. The drop checker translates diffuser output into an actual water-chemistry reading.
Practical starting points by tank volume:
- Nano tanks under 30 litres: 0.5–1 BPS. Very small volumes saturate quickly; start low and observe drop checker colour over 2–3 hours before adjusting.
- 30–100 litres: 1–2 BPS. Standard planted community tank range. Most quality diffusers produce adequate CO2 mist at this rate.
- 100–200 litres: 2–3 BPS. High plant density or heavy fish load may push requirements toward the upper end.
- 200–400 litres: 3–5 BPS. Consider an inline atomiser or reactor rather than a surface diffuser at this scale — fine mist diffusion efficiency degrades in large water volumes.
- 400+ litres: Multiple injection points or a CO2 reactor is recommended. Single diffuser rates above 5 BPS often produce excess surface misting without proportionate dissolved CO2 gain.
Spec Comparison Table
| Feature | Basic Counter | Counter + Check Valve | Counter + Drop Checker Combo |
|---|---|---|---|
| Bubble visibility | Good | Good | Excellent |
| Suck-back protection | No | Yes | Yes (most combos) |
| CO2 level feedback | Rate only | Rate only | Rate + dissolved CO2 |
| Mounting style | Inline or clip | Inline | Clip or suction cup |
| Indicator fluid included | No | No | Yes (often) |
| Glass vs. acrylic body | Acrylic | Acrylic | Glass (premium) / Acrylic |
| Suitable tank size | Any | Any | Any |
Drop Checker Colour Guide and What to Do
The drop checker uses a bromothymol blue (BTB) indicator solution that shifts colour based on dissolved CO2 concentration in the tank water surrounding the checker. The solution inside the checker equilibrates with tank water through a diffusion process, giving a lagging but accurate reading of ambient CO2 levels. Standard colour interpretation:
- Blue: CO2 too low — less than 15 ppm. Increase bubble rate by 0.5 BPS and wait 2 hours to re-evaluate.
- Blue-green / teal: CO2 optimal — approximately 25–35 ppm. This is the target zone for planted tanks with fish. Maintain current bubble rate.
- Yellow-green: CO2 slightly high — approaching 40 ppm. Reduce bubble rate slightly and monitor fish behaviour for any sign of stress.
- Yellow: CO2 too high — above 40 ppm. Reduce immediately. Fish may be gasping at the surface. Increase surface agitation temporarily to off-gas excess CO2.
The drop checker lags behind real-time dissolved CO2 by approximately 1–2 hours, so always make adjustments incrementally and allow time for the new equilibrium to register. Sharp swings in bubble rate produce unstable CO2 levels that stress both plants and fish. For diffuser placement strategy that maximises CO2 distribution, see our aquarium CO2 diffuser placement guide.
Bubble counters and drop checkers are most effective when your CO2 injection is running on a timer coordinated with your light cycle — CO2 on one hour before lights, off one hour before lights out. This prevents CO2 buildup in a dark tank when plants are not consuming it. For full CO2 system setup including regulator, solenoid, and timer configuration, see our planted tank CO2 system setup guide.
Consistent CO2 delivery also depends on the quality of your diffuser — a clogged ceramic diffuser produces larger, less efficient bubbles that dissolve poorly regardless of what your bubble counter reads. Combine your bubble counter monitoring practice with regular diffuser maintenance covered in our aquarium CO2 diffuser cleaning guide.
FAQ: Aquarium CO2 Bubble Counter
Does the liquid in an aquarium CO2 bubble counter need to be replaced?
The water in a bubble counter gradually absorbs CO2 and becomes mildly acidic, which does not affect its counting function but can cause algae growth inside the chamber over time. Refill with fresh distilled or RO water every 4–8 weeks, or whenever the chamber water appears discoloured or cloudy. Adding a single drop of household bleach to the refill water prevents algae growth without affecting bubble visibility — rinse the chamber thoroughly before refilling if using this approach.
How accurate is bubble-per-second counting for CO2 dosing?
Bubble counting is a consistent reference point, not an absolute CO2 measurement. The actual volume of CO2 per bubble varies with regulator pressure, tubing diameter, and the bubble counter’s chamber design — meaning 1 BPS on one setup may not equal 1 BPS on another. This is why the drop checker is the essential companion instrument: it translates your specific setup’s bubble rate into an actual dissolved CO2 concentration reading, allowing you to calibrate your specific bubble rate to the optimal dissolved CO2 target range.
Where should I position the CO2 bubble counter in the tubing run?
Mount the bubble counter immediately after the regulator needle valve — as close to the CO2 source as practical. This gives you the most stable, consistent bubble count because the CO2 pressure at this point has already been reduced and regulated. Positioning it further down the tubing run, near the diffuser, introduces measurement variability caused by tubing pressure fluctuations and suck-back effects. Always install a check valve downstream of the bubble counter if the counter does not have one built in.
My drop checker stays blue even at high bubble rates — what is wrong?
A persistently blue drop checker at elevated bubble rates usually indicates one of three problems: the diffuser is clogged and not dissolving CO2 efficiently into the water column; surface agitation is too high and CO2 is off-gassing before it can dissolve; or the tank’s KH (carbonate hardness) is very high, buffering the pH so strongly that CO2 cannot shift it measurably. Check the diffuser for ceramic clogging first — a clean diffuser producing dense fine mist is the foundation of effective CO2 injection. Then evaluate surface agitation and KH, adjusting each variable individually.
Can I use an aquarium CO2 bubble counter with a DIY yeast CO2 system?
Yes — a bubble counter is arguably more important for DIY yeast systems than for pressurised setups, because yeast CO2 output is inherently variable and impossible to adjust via a needle valve. The bubble counter gives you a real-time visual of output fluctuation as the yeast culture rises and falls in activity over its 1–3 week lifespan. Pair it with a drop checker so you know when output has dropped below the effective dosing threshold and the yeast culture needs refreshing. Check-valve function is essential with DIY systems — yeast pressure is low and suck-back is a constant risk.