Last Updated: September 25, 2026
Reef tank lighting schedule planning has two parts that get confused constantly: the daily pattern of hours and ramps, and the multi-week acclimation that gets corals to that pattern safely. The two tables below cover both of them, because running the right schedule too soon is exactly how corals end up bleaching.
As an Amazon Associate we earn from qualifying purchases.
As an Amazon Associate we earn from qualifying purchases at no extra cost to you. Prices and availability are accurate as of the date shown and are subject to change.

NICREW NavaReef LED Reef Light, 135W Aquarium Lighting for LPS/SPS Corals
Selected for "Reef Tank Lighting Schedule: Hours, Ramps and Acclimation": this listing is lighting (NICREW NavaReef LED Reef Light, 135W Aquarium Lighting for LPS/SPS Cor), matching the equipment this article covers.
View on Amazon
Pawfly 48W Saltwater Aquarium Light for 48" to 54" Fish Tanks Dimmable LED Reef Light for Coral Extendable Marine Fish Tank Light with Full Spectrum D/N Mode Timer Auto On/Off Adjustable Brightness
Selected for "Reef Tank Lighting Schedule: Hours, Ramps and Acclimation": this listing is lighting (Pawfly 48W Saltwater Aquarium Light for 48" to 54" Fish Tanks Dimmable), matching the equipment this article covers.
View on Amazon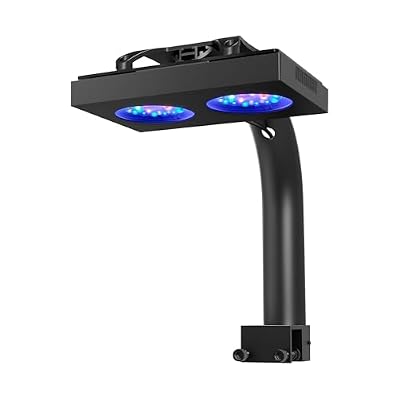
NICREW HyperReef 100 Gen 2 LED Reef Aquarium Light, 100W for LPS SPS Corals
Selected for "Reef Tank Lighting Schedule: Hours, Ramps and Acclimation": this listing is lighting (NICREW HyperReef 100 Gen 2 LED Reef Aquarium Light, 100W for LPS SPS C), matching the equipment this article covers.
View on Amazon
REEFB 72W Reef Light with APP Control
Selected for "Reef Tank Lighting Schedule: Hours, Ramps and Acclimation": this listing is lighting (REEFB 72W Reef Light with APP Control), matching the equipment this article covers.
View on AmazonBy David Nguyen
Quick answer: Our top pick in 2026 is the Blue dawn — our #1 rated choice. See the full ranked comparison, alternatives and buying advice below.
Daily Phases, PAR Targets and How to Read Them
A workable reef tank lighting schedule is built from just three numbers: total hours the fixture is on, the length of the full-intensity peak inside that window, and the target PAR for the corals that you actually keep. The first table gives a daily pattern, the second gives coral targets.
The decisive numbers: total hours, peak length and PAR
The daily reef tank lighting schedule breaks down into distinct phases. Most systems run a total window of roughly 8–12 hours, with a full-intensity peak of about 6–8 hours and gentle ramps either side. The ramps matter for appearance and for fish, and add hours without much extra light.
| Phase | Typical duration | Intensity | Purpose |
|---|---|---|---|
| Blue dawn | 60–90 minutes | Low, blue channels only | Gentle start, natural appearance |
| Ramp up | 60–90 minutes | Rising to peak | Avoids an abrupt intensity jump |
| Peak | 6–8 hours | Full target intensity | The period corals actually use |
| Ramp down | 60–90 minutes | Falling from peak | Mirrors the morning transition |
| Blue dusk | 60–90 minutes | Low, blue channels only | Viewing time, settles fish |
PAR targets by coral type, with a worked example
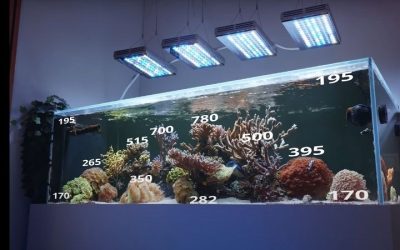
PAR requirements vary enormously between the coral groups, and mixing them means planning by position in the tank rather than by a single number. Placement height does most of the work here, since the reading down at the sand bed can be a small fraction of the reading near the surface.
| Coral group | Typical PAR range | Usual placement | Note |
|---|---|---|---|
| Soft corals | Roughly 50–120 | Lower third, shaded areas | Tolerant of a wide range |
| LPS | Roughly 80–150 | Sand bed to lower rock | Dislikes strong direct flow |
| Mixed reef target | Roughly 100–200 | Mid rockwork | Common compromise setting |
| SPS | Roughly 200–400 | Upper rockwork | Needs stable chemistry too |
| New frags, any type | Below the target | Lower, then move up | Acclimate over several weeks |
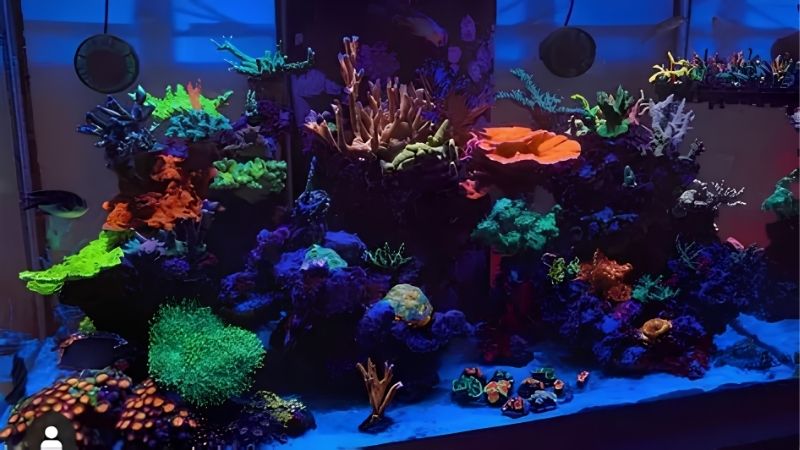
A worked example makes both of the tables concrete. A mixed reef running a 10 hour window might use 90 minutes of blue dawn, 60 minutes ramping up, 6 hours at peak, 60 minutes ramping down and 90 minutes of blue dusk, with the rock arranged so that LPS sits low down and SPS sits high up.
Reading the tables, units and tolerance
Every figure here is a band rather than a fixed target, and reef keepers reasonably disagree about where the edges fall. Coral colour and polyp extension are far better guides than any published number is, and both respond within days to a schedule that is genuinely wrong for the system.
Note also that PAR readings vary hugely across any single reef tank. The reading directly under a fixture near the surface can be several times what the sand bed receives, which is precisely why placement is the main tool for matching corals to light rather than the schedule itself is.
Adjusting the Schedule for a Real System
The tables assume an established system with stable chemistry. Any reef tank lighting schedule has to be adjusted for the age of the tank, the corals actually in it, and how recently the fixture or its settings changed, because corals respond to change more than to absolute values.
Acclimating corals and new fixtures
Start a new fixture well below its intended setting, commonly around a quarter to a half of target intensity, then raise it in small steps of perhaps five to ten percent each week. Reaching the intended schedule over four to eight weeks is normal rather than excessively cautious.
The same principle applies to individual corals. A frag arriving from a system with different lighting should be placed lower than its eventual position at first and moved up gradually over several weeks, watching colour and polyp extension at each stage before moving it any higher.
Adjusting for tank age and coral response
New systems benefit from a noticeably shorter peak. A tank in its first few months has unstable nutrients and is prone to algae, so many reef keepers begin with a peak of four to six hours and then extend towards the normal range once the system settles and coralline growth appears.
Coral response then drives all the fine adjustment. Colours paling or tissue receding at the tips suggests too much light, while browning and stretched polyps suggest too little, and both of those are more informative than a meter reading taken at one single point in the rockwork.
Tank size, placement and physical fit
Fixture height above the water changes PAR substantially, and it also changes the spread. Mounting the unit higher gives a wider, more even footprint at lower intensity, which suits mixed reefs well, while mounting lower concentrates output and creates stronger gradients through the rockwork.
Weight sets the wider limits here as well: a full tank runs near 10 lb per gallon (about 1 kg per L), so a 55 gallon (208 L) system passes 600 lb (272 kg) before rock and sand are counted. Measure the tank and the mounting height with a tape before ordering any fixture or hanging kit.
The Limits of a Fixed Schedule
Hours and ramps are only one part of what decides how corals actually look. Any reef tank lighting schedule sits inside a system where chemistry, flow and nutrients all matter, and adjusting the light is frequently the wrong response to a problem that originated elsewhere entirely.
When lighting is not the problem
Alkalinity swings cause coral stress that looks almost exactly like a lighting problem, particularly tissue recession on SPS. Stability across alkalinity, calcium and magnesium generally matters more than the precise light level, and chasing light while chemistry swings solves nothing.
Nutrients are the other frequent confound here. A system stripped down to undetectable nitrate and phosphate produces pale, unhappy corals regardless of the schedule, and reducing the light in that situation makes the appearance worse rather than addressing what is actually wrong.
What the schedule cannot capture
Flow interacts with light in ways that no schedule can describe. A coral receiving adequate PAR but sitting in a dead spot accumulates detritus and struggles, while the very same coral in appropriate flow at the same light level does well, which no adjustment to the hours can fix.
Spectrum and fixture type also change the outcome even at identical PAR. Reef fixtures are heavily weighted to blue, and a reading taken under one fixture does not translate directly to another with a different channel mix, so schedules copied between different systems need watching carefully.
When to abandon the table and watch the corals
Observation beats arithmetic here, and it does so in both directions. Bleaching, rapid tissue necrosis or colours washing out all mean the light is too strong for that placement, and browning with stretched polyps means the opposite, whatever a published PAR range might happen to suggest.
Move the coral itself before changing the schedule. Placement is a per-coral adjustment while the schedule affects the whole system, so relocating one struggling frag lower in the rockwork is nearly always a better first step than dimming the fixture for everything else in the tank.
Verifying the Schedule and Reviewing It
A reef tank lighting schedule needs occasional verification, because controllers lose their settings, fixtures decline and corals grow up into the light. None of that is dramatic on its own, but all of it moves the system away from the arrangement that was working a year earlier.
How to verify what is actually running
Check the controller schedule against a clock at least a few times a year, and after any power interruption, since some units revert to defaults or lose the programme entirely. Written notes of the intended settings make restoring them a five minute job rather than a prolonged guessing exercise.
Photograph the tank each month from the same position and under the same settings. Colour changes happen slowly enough to escape notice from one day to the next, and a photo series reveals that drift far more reliably than memory ever does, particularly across the darker winter months.
How often to review the settings
Review the settings after any change to the fixture, the mounting height or the rockwork, and otherwise every few months. Corals grow upward and outward, so a colony that sat comfortably at mid-height two years ago may now be receiving considerably more light than it was originally placed for.
Review the placement again when adding any new livestock. A new coral changes nothing about the schedule itself, but it does mean finding a placement that matches its requirements rather than adjusting the entire system around one animal that could simply be positioned differently.
Equipment that drifts away from the plan
LED output declines slowly across the years, which shows up as gradual browning in the corals long before anything in the tank actually looks dim. That is a reason to review the placement and intensity settings rather than to replace a fixture that is otherwise working perfectly well.
Salt creep and mineral film on the lenses both reduce output measurably, and they build up faster than freshwater condensation does. Wiping the fixture down regularly is the single most effective maintenance task available, and it costs nothing beyond a cloth and a few minutes of your time.
Frequently Asked Questions
These questions tend to follow on quite naturally from using the two tables above, because any reef tank lighting schedule interacts closely with placement, chemistry and flow, and adjusting the hours alone rarely produces the change that people are hoping to see in their corals.
How long should reef lights be on each day?
A total window of roughly 8–12 hours with a full-intensity peak of about 6–8 hours suits most systems, with gentle ramps arranged on either side of it. New tanks often start with a shorter peak and then extend it once nutrients stabilise and the system stops producing nuisance algae.
How slowly should I increase intensity on a new fixture?
Start at roughly a quarter to a half of the target and raise it by around five to ten percent each week, reaching the intended setting somewhere across four to eight weeks. Corals respond badly to any sudden increase, and bleaching caused by a rushed changeover is difficult to reverse.
Do I need a moonlight period?
Not for the health of the corals. Low blue lighting at night is largely for the owner’s benefit, and some keepers avoid it entirely on the basis that a genuine dark period suits fish better. If it is used at all, keep it dim and brief rather than running it right through the night.
Should the schedule change between seasons?
The schedule itself does not need to change, since the fixture provides the light rather than the room does. What does change is ambient daylight reaching the tank and room temperature, both of which are worth reviewing when the seasons turn even though the programme stays fixed.
See More:
Conclusion
A practical reef tank lighting schedule runs a total lit window of roughly 8–12 hours with a 6–8 hour peak and ramps either side, and it matches corals to PAR by placement rather than by adjusting the whole system around them. Acclimate any new fixture across four to eight weeks.
Ready to decide? Our #1 pick for 2026 is the Blue dawn.
Live price & availability on Amazon.
Related Reviews & Guides


Best Reef Octopus VarioS Pump for Return Flow: Top Picks

What Size Protein Skimmer for 75 Gallon Reef? Size Guide With Measurements (2026)