Last Updated: September 27, 2026

Reef Octopus Classic 150INT Protein Skimmer
Included for 'Protein Skimmer Setup and Tuning Guide: Best Expert Picks' as a relevant option in this category; details come from the product listing.
View on Amazon
Reef Octopus Classic 110-INT Needle Wheel Protein Skimmer for Aquarium
Included for 'Protein Skimmer Setup and Tuning Guide: Best Expert Picks' as a relevant option in this category; details come from the product listing.
View on Amazon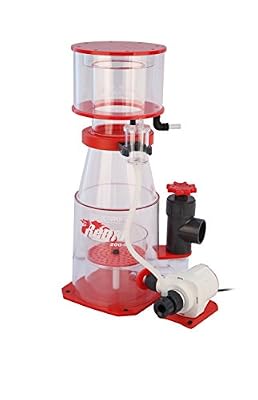
Reef Octopus Regal Internal Protein Skimmer REGAL-200INT
Included for 'Protein Skimmer Setup and Tuning Guide: Best Expert Picks' as a relevant option in this category; details come from the product listing.
View on Amazon
Reef Octopus OCTO Regal 150 SSS Space Saver Protein Skimmer
Included for 'Protein Skimmer Setup and Tuning Guide: Best Expert Picks' as a relevant option in this category; details come from the product listing.
View on AmazonMost tuning problems are really installation problems wearing a disguise. This protein skimmer setup and tuning guide starts with the exact water depth your model publishes, then works through starting positions, the break-in window and how to read the foam you actually get.
As an Amazon Associate we earn from qualifying purchases.
By David Nguyen
Why a Skimmer Overflows or Pulls Nothing
Four checks isolate the likely cause before any adjustment at all: whether the water depth matches the published range, whether the unit is still within its break-in window, whether air and organic load are balanced, and whether any recent additives or chemistry changes are driving the foam.
Confirm the Exact Model Water Depth
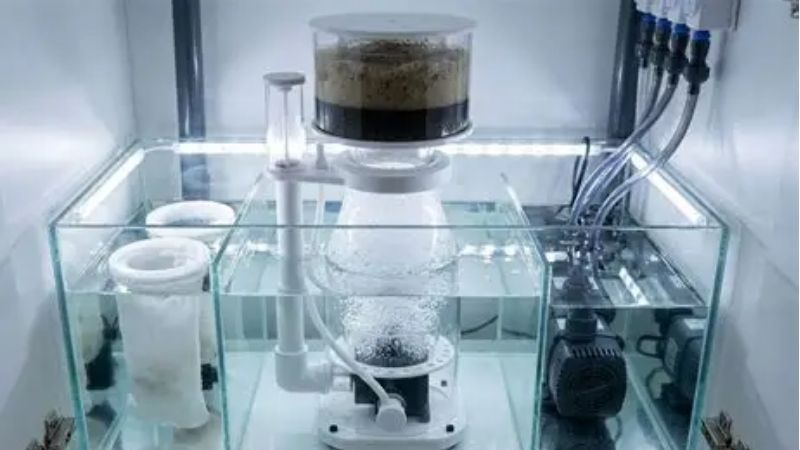
Operating depth is strictly model-specific and those figures are not interchangeable. NYOS publishes 8.5 inches of water for the Quantum 120, TUNZE specifies an immersion range of 8.9 to 9.7 inches for the 9004, while BRS lists 9.5 to 11 inches of water height for the Curve 5 Elite.
Measure the actual water height at the skimmer position itself rather than elsewhere in the sump, since baffles create genuinely different levels within a single sump chamber. A body outside its published range cannot be tuned into correct behaviour by any amount of patient adjustment.
Check Whether Break-In Is Still Running
New skimmers tend to behave erratically while their internal surfaces condition, and BRS guidance describes roughly five to seven days on a DC unit, and about a week on an AC unit, before final tuning. Foam produced during that window tells you very little about the eventual settings.
The diagnostic question here is simply how long the unit has actually been running. Where that answer is under a week, the correct action is simply to leave the adjustment alone entirely and allow the whole break-in period to finish before drawing any firm conclusions about performance.
Balance Air Against Organic Load
More air is not automatically better, and BRS frames tuning explicitly as a balance between the air draw and whatever organic load is genuinely available to process. Excess air relative to the available organics produces wet, unstable foam and can push microbubbles into the display.
The opposite failure looks remarkably similar from a distance, since insufficient air or a body sized well beyond the system also produces thin skimmate. Establish which side of that balance you are actually on before adjusting, because those two faults require completely opposite corrections.
Rule Out Chemistry and Additives
Overflow has several possible causes rather than any single one, and recent dosing, new foods, medications or a water change can all change surface tension enough to alter foam behaviour overnight. A skimmer that suddenly overflows after months of quiet stability rarely has any mechanical fault.
Note carefully what actually changed during the previous few days before touching the adjustment collar. Where an additive proves responsible, the sensible response is usually to lower the foam level temporarily or to close the collection cup valve rather than retuning the whole unit.
Set Up and Tune a Protein Skimmer Step by Step
Four steps follow here in sequence, each carrying its own stated waiting period. Work through them in strict order rather than adjusting continuously, because the single most common tuning mistake is making several changes at once and then losing track of which one produced the result.
| Symptom | Sign Alongside | Likely Cause | First Action |
|---|---|---|---|
| Cup overflows constantly | Unit under a week old | Break-in still running | Wait out the window |
| Thin, watery skimmate | Foam never climbs neck | Air and load mismatch | Check depth, then air |
| Microbubbles in display | Foam refuses to stabilise | Excess air or oversizing | Reduce air, reassess size |
| Sudden overflow | Recent dosing or feeding | Surface tension change | Lower foam level briefly |
Step One, Set the Water Depth First
Install the skimmer and then set the sump water height to the range your manual publishes, whether that means 8.5 inches for a Quantum 120, 8.9 to 9.7 inches for a TUNZE 9004 or 9.5 to 11 inches for a Curve 5 Elite. Nothing downstream of this works until the level itself is correct.
Check that level with the return pump running and the display at operating height, since static measurements simply mislead. Mark that correct height on the sump wall so evaporation becomes obvious, because a falling water level changes skimmer behaviour before anything else reveals it.
Step Two, Use the Correct Starting Position
Starting positions differ considerably by pump type. BRS general guidance for an AC skimmer is to begin with the outlet valve roughly 50 percent open, while a DC unit starts with the outlet fully open and the internal water level at its lowest setting before anything else happens.
Treat both of those as general workflows rather than as rules, since the manual for your exact model always overrides any generic starting point. Where the two happen to disagree, always follow the manual and use the general workflow only to understand what each adjustment is actually meant to achieve.
Step Three, Wait Out the Break-In Window
Leave the settings entirely alone for the published period, roughly five to seven days on a DC skimmer and about a week on an AC unit. Internal surfaces condition during that time and foam typically stabilises without intervention, which is precisely why early adjustment wastes effort.
Record what the skimmer produces on each day rather than simply reacting to it immediately. A simple daily note of cup contents and foam height gives you a baseline, and that baseline is what makes the single adjustment in the next step genuinely interpretable rather than guesswork.
Step Four, Adjust in Single Increments
Change one single thing at a time, then wait. BRS guidance suggests moving the foam level by about one inch and then evaluating the result for roughly 24 hours before deciding whether the change helped, which is slower than most owners expect but considerably more reliable in practice.
Maintenance follows exactly the same conditional logic, with cup and neck checks commonly falling within a three to seven day window, and body or pump cleaning on a 30 to 90 day cycle. Both of those intervals depend heavily on bioload rather than functioning as fixed universal schedules.
Frequently Asked Questions
Four questions follow on from any setup: how long the tuning really takes, whether overflow always means a fault, whether more air genuinely helps, and how often cleaning is actually needed. Direct answers below, along with the exceptions that genuinely matter once a system is running.
How Long Does Tuning Actually Take?
Plan on two or three weeks running from first installation through to genuinely settled behaviour. The break-in window alone runs roughly five to seven days on a DC unit by itself, and each subsequent adjustment then needs around 24 hours of observation before its effect can be judged at all fairly.
Systems still maturing take longer again, since the organic load changes from week to week throughout the first months of any new reef. Expect to revisit those settings as both stocking and feeding increase over time, rather than treating that first stable configuration as permanent.
Does Overflow Always Mean Something Is Wrong?
No, and diagnosing one single cause from overflow alone is the classic diagnostic error here. Break-in, excess air relative to organics, a foam level set too high, a recent additive or simply an incorrect water depth can each produce more or less the same visible outcome in the collection cup.
Work through those causes in order of likelihood for your own situation, starting with how long the unit has run and with what changed recently. A skimmer that overflowed once after feeding needs no adjustment at all, while one overflowing daily after three full weeks certainly does.
Will More Air Improve Skimming?
Only up to the point at which the organic load available can genuinely support it. BRS frames tuning as a balance between air draw and available organics, so increasing the air beyond that balance produces wetter foam, more microbubbles and frequently rather less useful skimmate in the cup.
The one exception is a system whose feeding has genuinely increased since setup, where rather more air draw may well now be supportable. Make that change in a single increment and evaluate after 24 hours, rather than opening the valve fully and hoping that the foam sorts itself out.
How Often Should You Clean During Tuning?
Keep both the cup and the neck clean throughout, since film buildup changes foam behaviour and will confuse your interpretation of any later adjustment. Published guidance commonly places cup and neck attention within a three to seven day window, depending entirely on the bioload.
Full body and pump cleaning sits on a considerably longer cycle, commonly described as 30 to 90 days, and again that interval depends on conditions rather than on the calendar. Treat both figures as guidance tied to your own system rather than as any sort of universal maintenance law.
Final Thoughts
Depth first, the correct starting position second, break-in third, then single adjustments with a day of observation. This protein skimmer setup and tuning guide works precisely because it removes the variables in order rather than chasing foam behaviour with continuous small changes.

Best Mounting Options for Reef LED Light: Secure Top Picks
Best Roller Filter For A 130 Gallon Reef: Top Compared Guide