Last Updated: September 25, 2026
Learning how to size an aquarium chiller by hp starts in the wrong place for most people. Horsepower is a label rather than a capacity, and a tank’s water volume on its own is not a cooling rate either. Begin instead by working out how much heat your system gains in BTU per hour, then match that rate to a published model rating and read the horsepower figure last.
As an Amazon Associate we earn from qualifying purchases.
By David Nguyen
Quick answer: For most people in 2026, the best how to size an aquarium chiller by hp is the Tank rises 4F+ on hot days — our #1 rated choice. See the full ranked comparison, alternatives and buying advice below.
What Decides the Chiller Size Your Tank Needs
Before touching a chiller spec sheet, gather four things: your true system volume, the temperature swing you need to control, how fast the tank actually gains heat, and the equipment and room conditions behind that gain. A chiller’s rating is a rate measured in BTU per hour, so the real target is the heat entering your water at that same per-hour rate. Measuring beats estimating at every step, since guesswork here is what produces a unit that runs all summer without holding temperature.
Measure Total System Water
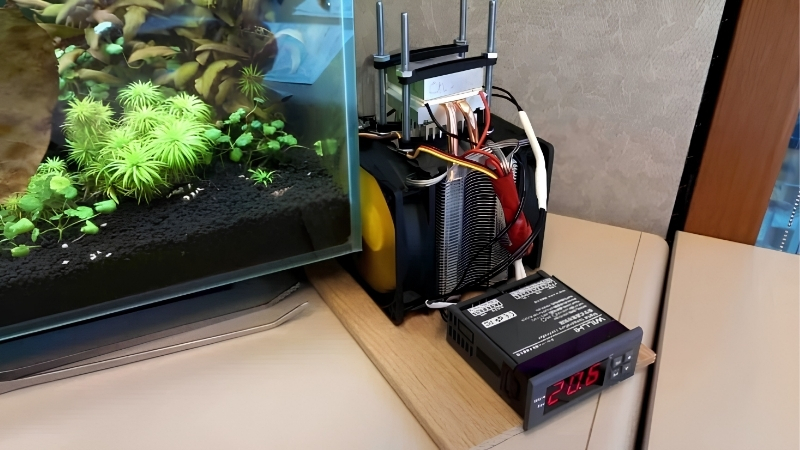
Use actual water volume, not the tank’s label. Displacement from rock and sand reduces it, while a sump, refugium and plumbing add to it, and the difference between label and reality is often substantial on a reef system. Fill buckets of known volume during a water change if you want a genuinely accurate figure.
A tank sold as 75 gallons might hold closer to 65 after aquascaping yet gain 20 from a sump. Work from filled volume rather than the box, because every later calculation multiplies whatever error you start with. Sump volume is the piece people forget most often, and it can shift the total by a quarter.
Determine Your Real Temperature Drop
Log the tank’s peak temperature on a hot day and subtract your target setpoint. That difference, the pull-down, is the swing the chiller has to erase once, and it belongs to your room and your lighting rather than to a general rule. A data-logging thermometer makes this easy, since peak temperature often arrives hours after lights out.
Record it during the worst conditions of the year rather than a mild week. Many systems need only 3 to 5F of pull-down, which is exactly why oversizing by guesswork wastes money on capacity you rarely use. A tank needing 8F in a hot upstairs room is a very different purchase from one needing 3F.
Turn Volume and Heat Gain Into BTU per Hour
This is where most sizing goes wrong. Gallons times 8.3 times the pull-down gives BTU, the one-time energy needed to move that water through the swing, not BTU per hour. For 55 gallons and a 4F pull-down that is about 1,826 BTU of energy, a quantity rather than a rate, so it cannot be matched against a chiller’s per-hour rating on its own. The 8.3 factor is simply the weight of a gallon of water in pounds, which is why the arithmetic works.
To get a rate, measure how fast the tank warms with cooling off: gallons times 8.3 times the degrees it rises per hour gives the heat gain in BTU per hour. A 55-gallon system creeping up about 2F each hour is gaining roughly 913 BTU per hour, and that continuous load, the heat from the room, lights and pumps, is the figure a chiller rating actually has to cover.
Account for Equipment and Room Heat
Pumps, powerheads and lighting all add heat continuously, and a warm room raises the baseline the chiller works against, so these sources are exactly what drives the hourly rise you measured. Two identical volumes with different lighting can need noticeably different chiller capacity.
Metal halide fixtures and submerged return pumps are the usual heavy contributors. Where possible, reduce that load first, because switching lighting or relocating a pump sometimes moves your requirement down a whole class. Room air conditioning is often the cheapest capacity upgrade available, since it lowers the baseline for every device.
How to Calculate and Choose an HP Class Step by Step
With those numbers in hand, the process is mechanical: turn your measured heat gain into a BTU per hour figure, compare it against published BTU ratings rather than horsepower labels, confirm the flow window, and check the installation will not defeat the unit.
| Symptom | Sign Alongside | Likely Cause | First Action |
|---|---|---|---|
| Tank rises 4F+ on hot days | Warm room, long photoperiod | Heat load exceeds passive cooling | Measure the hourly rise, then size in BTU/h |
| Chiller runs constantly | Never reaches setpoint | Undersized for the real heat load | Recheck volume and rise rate, size up |
| Chiller cycles very briefly | Short run times, frequent starts | Oversized or differential too narrow | Widen differential, set compressor delay |
| Cooling weak despite right HP | Flow outside published window | Feed pump mismatched after head loss | Measure delivered flow, valve to spec |
Step One: Run the Numbers
Start with the rate. Multiply system gallons by 8.3 by the degrees your tank rises per hour with cooling off, and the result is the heat gain in BTU per hour, which is the load the chiller must remove continuously. A 100-gallon system rising about 2.5F an hour works out near 2,075 BTU per hour.
Then check recovery. The one-time pull-down energy, gallons times 8.3 times the full swing, tells you how much heat sits above setpoint after a hot spell; divide it by the hours you will tolerate for recovery and add that to the steady load. Keep both figures, because the steady rate sets the minimum class while the recovery demand is why you size a little above it.
Step Two: Match a Published BTU Rating
Now compare your BTU per hour load against real chiller models rather than horsepower. JBJ rates the DBA-075 at 1/10 HP and 1,270 BTU per hour, the DBA-150 at 1/5 HP and 2,400, the DBE-200 at 1/4 HP and 3,000, and the DBM-250 at 1/3 HP and 4,000 BTU per hour, each measured under its own stated conditions.
Notice those figures do not scale linearly with horsepower, which is precisely why HP alone is a poor sizing unit. Choose the first class whose published rating covers your calculated load with a little margin, and compare rate to rate only, since a BTU energy figure and a BTU-per-hour rating are different units that do not line up. Verify the listed generation is still current, since model lines in this category refresh regularly.
Step Three: Confirm the Flow Window
Every unit needs a specific flow through its exchanger: 240 to 960 GPH for the DBA-075, 480 to 1,320 for the DBA-150, 480 to 1,920 for the DBE-200 and 480 to 2,420 for the DBM-250. Those windows widen as the class grows, which gives larger units more pump flexibility.
Calculate delivered flow after head loss from lift, hose and fittings rather than using the pump’s box rating. A correctly sized chiller fed outside its window underperforms, so keep a valve in the line to trim into range. Recheck that delivered flow annually, because fouling inside the exchanger raises resistance as the system ages.
Step Four: Check Installation and Ventilation
Confirm the electrical circuit can carry the unit alongside your other equipment, and leave clearance around the condenser so exhaust heat escapes. A chiller buried in a sealed cabinet raises its own ambient and lengthens run time.
Budget for unions either side of the unit so it can be removed for flushing. Fouling inside the exchanger raises resistance and cuts transfer efficiency over months, which quietly erodes the margin you calculated at the start. Chillers and large reef equipment discount hardest around Prime Day and Black Friday, useful timing for a planned upgrade.
Frequently Asked Questions
Four questions come up whenever people work through this calculation: what a typical mid-size tank needs, whether a small class covers most systems, how BTU and HP relate, and what oversizing actually costs.
What size does a 75 gallon tank need?
There is no single answer, because it depends on how fast your specific 75-gallon system gains heat rather than on its gallon label. Measure the hourly rise with cooling off: at 75 gallons creeping up about 2F an hour, 75 times 8.3 times 2 is roughly 1,245 BTU per hour of heat to remove. That per-hour rate, not the tank size, is the number you take to a spec sheet.
Roughly 1,245 BTU per hour puts the 1/5 HP class at 2,400 within comfortable margin, while the 1/10 HP at 1,270 sits almost exactly at the load with no headroom for a hot week. Your sump volume, lighting and room temperature decide which of those is the honest answer.
Is 1/10 HP enough for most tanks?
Only for modest heat loads. The DBA-075 at 1/10 HP is rated at 1,270 BTU per hour, which covers something like a lightly lit 40-gallon system gaining a degree or two an hour, not a heavily lit larger display in a warm room. The published band tells you the class, and your own measured rise tells you whether it fits.
Calculate before assuming. A small class running continuously without reaching setpoint costs more in electricity and wear than buying the correct capacity would have, and it leaves livestock exposed during the hottest week. Warranty terms rarely cover a unit run continuously beyond its intended capacity either.
Why not just compare horsepower?
Because horsepower and cooling output do not track together. Going from 1/10 to 1/3 HP moves published output from 1,270 to 4,000 BTU per hour, so the horsepower ratio and the cooling ratio tell different stories.
Manufacturer gallon labels are equally unreliable across brands, since each uses its own assumptions about ambient temperature and heat load. BTU per hour with a stated condition is the only figure that compares cleanly. Ask for the test condition behind any BTU figure, and treat its absence as a reason for caution.
What does oversizing actually cost?
More money up front, more exhaust heat in the room, and short cycling. A compressor that satisfies the setpoint in a few minutes starts and stops frequently, which is harder on components than steady moderate running. You also pay for a larger circuit draw you did not need.
A modest margin above your calculated requirement is sensible; two classes above it is not. Pair adequate capacity with a proper compressor delay and a sensible differential so the unit runs in longer, less frequent cycles. Frequent starts are also what shortens compressor life fastest in home reef systems.
Final Thoughts
Working out how to size an aquarium chiller by hp really means working in BTU per hour: match the chiller’s rated output to how fast your system actually gains heat, not to its gallon label or its one-time swing. Measure real volume and the hourly rise with cooling off, turn that into a load with gallons times 8.3 times the rise, size a published rating just above it for margin, and confirm the flow window before ordering.
As an Amazon Associate we earn from qualifying purchases at no extra cost to you. Prices and availability are accurate as of the date shown and are subject to change.

Fitnet 79 Gal Aquarium Chiller, 1/3 HP Fish Tank Water Chiller, Hydroponic Water Chiller with Touch Screen, Hydroponics System Axolotl Jellyfish Coral Reef 300L
Selected for "How to Size an Aquarium Chiller by HP: Best Proven Guide": this listing is chillers (Fitnet 79 Gal Aquarium Chiller, 1/3 HP Fish Tank Water Chiller, Hydrop), matching the equipment this article covers.
View on Amazon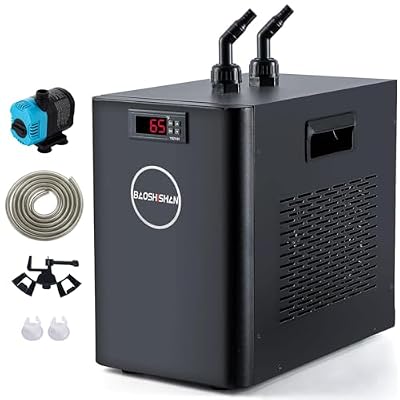
BAOSHISHAN 1/10 HP Aquarium Chiller 42 Gal Fish Tank Water Chiller 110V
Selected for "How to Size an Aquarium Chiller by HP: Best Proven Guide": this listing is chillers (BAOSHISHAN 1/10 HP Aquarium Chiller 42 Gal Fish Tank Water Chiller 110), matching the equipment this article covers.
View on Amazon
VEVOR Aquarium Chiller, 110 Gallon, 1/3 HP Water Chiller for Hydroponics
Selected for "How to Size an Aquarium Chiller by HP: Best Proven Guide": this listing is chillers (VEVOR Aquarium Chiller, 110 Gallon, 1/3 HP Water Chiller for Hydroponi), matching the equipment this article covers.
View on Amazon
VEVOR Aquarium Chiller 92Gal 1/4HP Quiet Cooler with Titanium Evaporator
Selected for "How to Size an Aquarium Chiller by HP: Best Proven Guide": this listing is chillers (VEVOR Aquarium Chiller 92Gal 1/4HP Quiet Cooler with Titanium Evaporat), matching the equipment this article covers.
View on AmazonReady to decide? Our #1 pick for 2026 is the Tank rises 4F+ on hot days.
Live price & availability on Amazon.
Related Reviews & Guides





Quick Picks: Best Natural Driftwood for Aquarium Decoration
Best Diy Vs Prebuilt Aquarium Stand For 75 Gallons: Compared