Last Updated: June 8, 2026


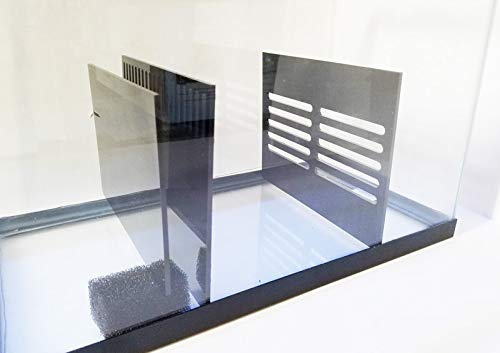
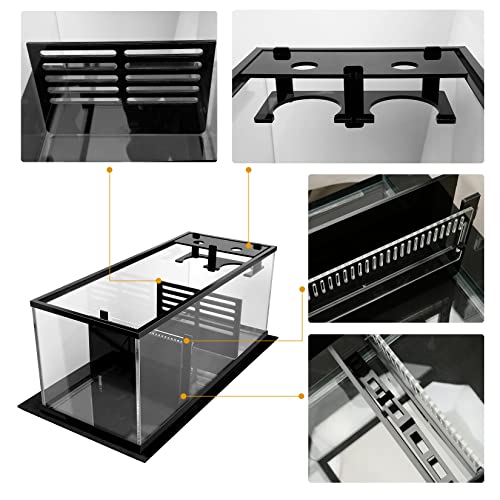
Aquarium sump baffles and acrylic dividers are the internal architecture that transforms a plain sump tank into a functional, compartmentalized filtration system with distinct zones for mechanical filtration, biological media, refugium growth, and return pump operation. Getting the baffle configuration right — correct height, proper acrylic thickness, and reliable bonding — determines how well your sump skims foam, controls microbubbles, and maintains a stable water level in the return section. Whether you’re buying a pre-made baffle kit or cutting your own DIY system, understanding what separates a quality acrylic divider from a problematic one is essential before you silicone anything permanently into place.
Quick Picks
CPR Aquatic Pre-Made Sump Baffle Kit
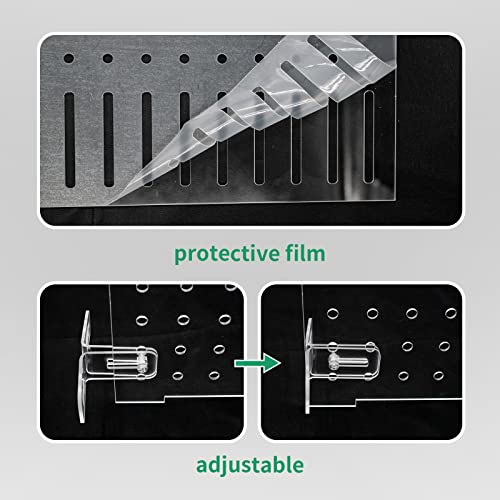
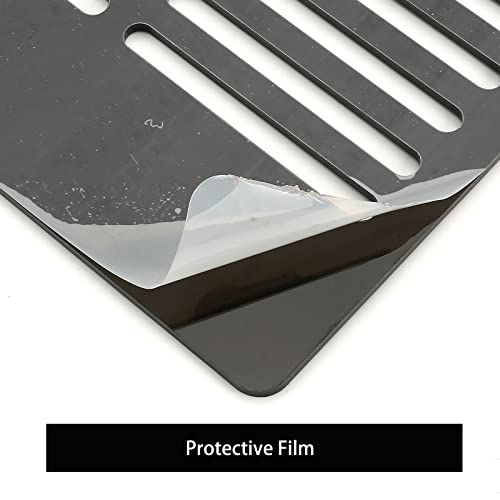
CPR Aquatic’s pre-made baffle kits are precision-cut to standard sump tank dimensions and arrive with clean, polished edges ready for silicone installation — eliminating the measurement, cutting, and edge-finishing steps that make DIY baffle builds time-consuming. The 1/4-inch cast acrylic panels are rigid enough to hold position reliably under water pressure.
- Precision-cut to standard 10, 20, and 30 gallon sump dimensions
- 1/4-inch cast acrylic — rigid and dimensionally stable
- Polished edges ready for immediate silicone bonding

As an Amazon Associate we earn from qualifying purchases. Product prices and availability are accurate as of the date/time indicated.
Trigger Systems Sump Acrylic Divider Panel
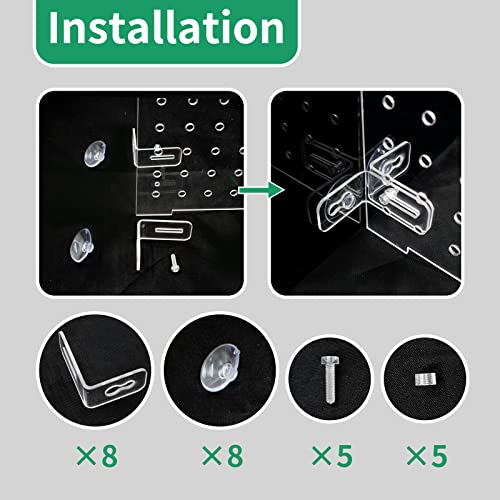
Trigger Systems produces high-quality pre-drilled and pre-cut acrylic sump panels that slot into designated channels in their sump lines, requiring no silicone and no permanent installation — a significant advantage for hobbyists who reconfigure sumps frequently or want a removable baffle system.
- Tool-free installation — no silicone required
- Removable and repositionable for sump reconfiguration
- Premium-grade cell-cast acrylic construction


As an Amazon Associate we earn from qualifying purchases. Product prices and availability are accurate as of the date/time indicated.
DIY Cast Acrylic Sheet — Cut-to-Size from Amazon
For hobbyists comfortable with basic measuring and cutting, purchasing a standard cast acrylic sheet and cutting baffles to size offers the most cost-effective path to a custom sump build. 1/4-inch sheets in 12×12 or 12×24-inch sizes provide sufficient material for most 20–40 gallon sump builds at a fraction of pre-made kit prices.
- Lowest cost per baffle — ideal for large or custom sump builds
- Full dimensional control for non-standard tank widths
- Same material quality as pre-made kits

As an Amazon Associate we earn from qualifying purchases. Product prices and availability are accurate as of the date/time indicated.
Why Trust Our Recommendations
Our evaluation drew on reef tank building community knowledge, hands-on sump construction experience, and verified hobbyist feedback on long-term baffle performance including silicone bond longevity, acrylic clarity retention, and microbubble control effectiveness. Both pre-made and DIY options were assessed for real-world practicality.
Detailed Reviews
1. CPR Aquatic Pre-Made Sump Baffle Kit — Best Turnkey Solution
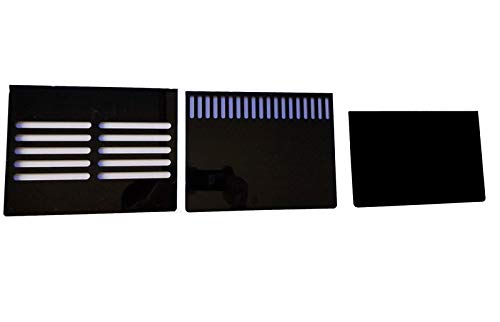
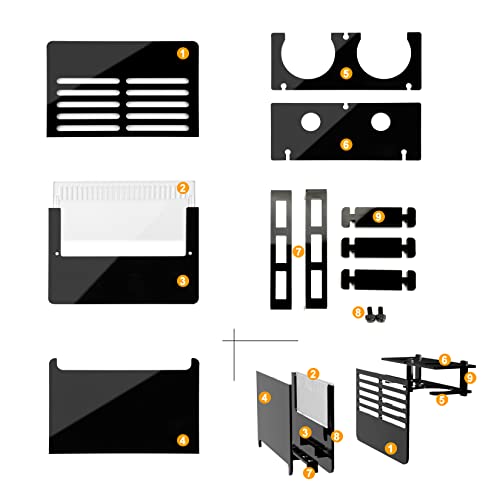
CPR Aquatic specializes in reef and marine filtration equipment, and their pre-cut baffle kits reflect professional-grade attention to dimensional accuracy. Kits are cut to fit specific standard aquarium tank widths (typically 10, 20, or 30 gallon equivalent sump dimensions), arriving as a set of panels in the correct heights for a three- or four-baffle configuration. The 1/4-inch cast acrylic used is dimensionally stable under long-term water immersion — it doesn’t warp, cloud, or bow even after years in a marine sump. Panel edges are machine-polished, providing the clean silicone bonding surface needed for a watertight seal without additional finishing work. Installation requires only aquarium-safe silicone sealant and standard clamping or taping during cure time.
Pros: Precision-cut for specific tank dimensions — no measuring or cutting | 1/4-inch cast acrylic stable long-term | Professional polished edges for clean silicone bond
Cons: Must specify tank dimensions accurately before ordering; limited to standard sizes
2. Trigger Systems Sump Acrylic Divider — Best for Modular Sumps
Trigger Systems is a premium sump manufacturer whose acrylic divider panels are engineered specifically for their sump product line, sliding into pre-routed channels in the sump body without any adhesive. This removable baffle system is a significant quality-of-life advantage over permanent siliconed installations — sections can be lifted out for cleaning, sump reconfiguration, or equipment access without any cutting or re-siliconing. The cell-cast acrylic panels used are optically clear and maintain that clarity through years of saltwater exposure. While the Trigger Systems dividers are designed primarily for their own sump products, the concept and quality standard they set is worth understanding when evaluating any sump baffle option.
Pros: No silicone required — fully removable and repositionable | Premium cell-cast acrylic maintains optical clarity | Designed-in integration eliminates bonding failure risk
Cons: Compatible only with Trigger Systems sump products; highest price point
3. DIY Cast Acrylic Sheet — Best for Custom Sump Builds
For hobbyists with non-standard tank dimensions, unusual sump configurations, or simply a desire to keep costs low, cutting baffles from 1/4-inch cast acrylic sheet stock is the most practical path. Cast acrylic (as opposed to extruded acrylic) is the correct material choice — it bonds more reliably with silicone, is more resistant to stress crazing over time, and edges more cleanly with basic cutting tools. Standard 12×24-inch sheets are large enough to yield four to six baffle panels for a 20–30 gallon sump, and the total material cost is typically 30–50% less than equivalent pre-made kits. The trade-off is the time and skill required to measure accurately, cut cleanly, and finish edges before installation.
Pros: Full dimensional freedom for any tank width | Lowest material cost per panel | Same material quality as pre-made kits
Cons: Requires accurate measuring, cutting tools, and edge finishing time
4. Eshopps Sump Baffle Assembly — Best Integrated System for Reef Tanks
Eshopps produces a range of reef-optimized sumps with integrated baffle systems that include all necessary dividers pre-installed and pre-bonded from the factory. Their sump designs use 1/4-inch acrylic throughout and incorporate a well-engineered bubble trap baffle configuration that effectively eliminates microbubbles from reaching the return section — a critical feature for display reef tanks where microbubbles in the main tank are visually disruptive and potentially harmful to sensitive corals. For reefers who want a complete, tested sump solution without any DIY involvement, Eshopps sumps represent strong value at their price point.
Pros: Factory-installed baffles eliminate DIY installation risk | Engineered bubble trap configuration for reef applications | Multiple size options for different display tank volumes
Cons: Complete sump purchase required — not a standalone baffle kit
Buyer’s Guide
Acrylic Thickness: 1/8-inch vs. 1/4-inch
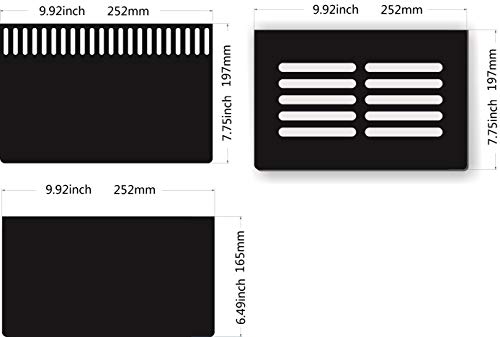
Baffle panel thickness is a frequent point of confusion. Thin 1/8-inch acrylic is workable for very shallow water column applications but bows noticeably under the lateral water pressure in a full sump, which can break silicone seals over time. The 1/4-inch thickness is the minimum recommended for any baffle taller than about 4 inches or used in a sump with significant water volume. For sumps over 30 gallons or baffles exceeding 10 inches in height, 3/8-inch acrylic provides additional rigidity worth the modest extra cost. Cast acrylic at either thickness bonds and machines better than extruded acrylic — always confirm “cast” on the product listing before purchasing for baffle use.
Silicone Bonding Technique for Permanent Baffles
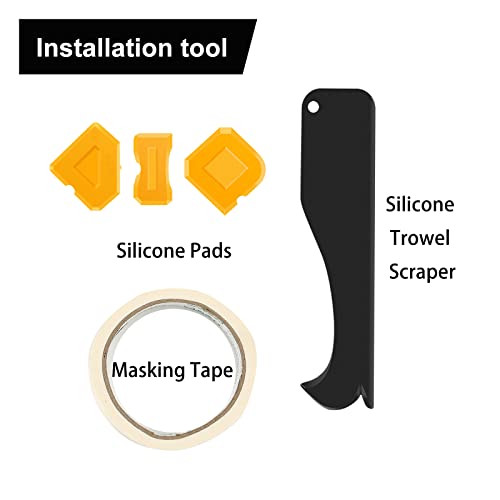
Proper silicone application is the difference between a watertight baffle and a slow leak. Use only 100% silicone sealant rated for aquarium use — never use silicone with mold inhibitors or fungicides, which are toxic to fish. Clean both the acrylic panel edges and the sump glass contact surfaces with isopropyl alcohol and allow to dry completely before applying silicone. Apply a consistent bead along the full contact length, press the panel into position, and use tape or clamps to hold it square and perpendicular while the silicone cures. Full cure takes 24–48 hours; do not add water until completely cured. A second silicone bead applied to the fillet joint after initial cure adds significant long-term strength.
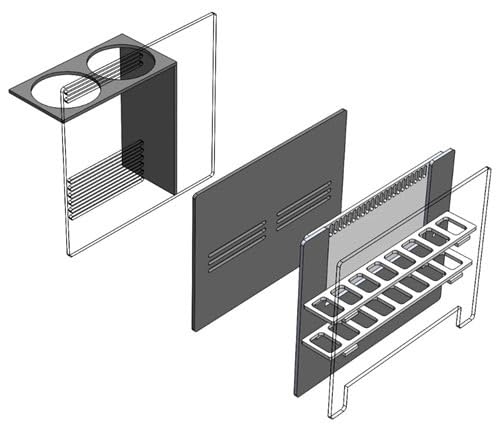
Standard Baffle Configuration for Bubble Trapping
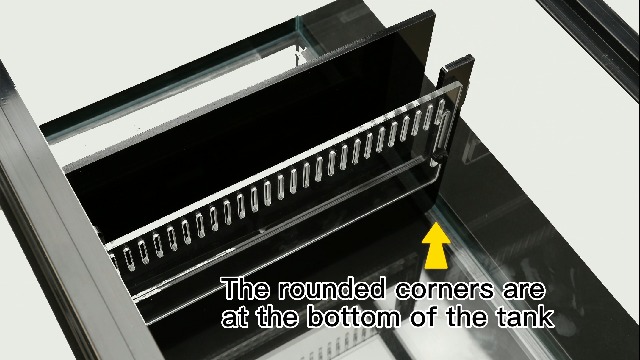
The classic three-baffle bubble trap consists of two tall baffles with a gap at the bottom (under-over configuration) followed by one shorter baffle at the end of the bubble trap section. Water flows under the first tall baffle, over the short baffle, and under the third tall baffle — this forces all water to pass below and above the water surface multiple times, which breaks up foam and traps air bubbles before they reach the return pump chamber. Baffle heights are typically measured relative to the desired water level in each section: tall baffles should reach to within 1–2 inches of the sump rim; the short baffle should sit 2–3 inches below the desired water level.
Frequently Asked Questions
What causes microbubbles in a sump, and how do baffles fix them?
Microbubbles in a sump are primarily generated by the protein skimmer and by water splashing from the drain inlet. Fine air bubbles are buoyant but slow to rise, so they can be carried through the water column and into the return pump, which then injects them into the display tank. A properly configured bubble trap baffle forces water through a series of under-over passages that give bubbles time to rise and dissipate before the water reaches the return section. Insufficient baffle height, incorrect spacing, or leaking baffles that allow short-circuiting are the most common causes of persistent microbubbles despite having a baffle system installed.
Can I use glass instead of acrylic for sump baffles?
Yes, glass baffles are used by some hobbyists and work well when properly bonded with aquarium silicone. Glass has the advantage of being scratch-resistant and algae-easy to scrape clean. The disadvantage is that glass is harder to cut accurately without specialized tools, has no flex tolerance (a slight bow in the sump can crack a glass baffle), and cannot be drilled without diamond-tipped bits. For most hobbyists, acrylic is more practical for DIY builds. If purchasing a glass sump and adding glass baffles, having a local glass shop cut panels to your specifications is the most reliable approach.
How do I remove an old siliconed baffle without damaging the sump?
Removing a siliconed acrylic baffle requires patience. Use a thin razor blade or utility knife to score through the silicone bead along all contact points, working gradually around the full perimeter without forcing the panel. Once the silicone is scored, gentle lateral pressure typically frees the panel. Remaining silicone on the glass can be removed by scoring and peeling it in strips, finishing with a razor scraper. Residual silicone traces should be cleaned with isopropyl alcohol before re-bonding. Never use harsh solvents on the acrylic panel surface, as acetone and many cleaners will craze and cloud acrylic permanently.
How tall should sump baffles be?
Baffle heights depend on your desired water levels in each sump section and the total sump tank height. As a practical starting point: tall under-flow baffles in a bubble trap should reach within 1 to 2 inches of the sump rim; the over-flow baffle should sit at the target water level you want in the skimmer section. The final baffle before the return pump section determines the stable water level in the return chamber — this level should be deep enough to keep the return pump submerged during normal operation and during the brief sag when the main pump stops. Measuring carefully before cutting is always worthwhile — acrylic can be trimmed down but cannot be made taller after cutting.
Final Verdict
For most reef and marine hobbyists building their first sump, the CPR Aquatic pre-made baffle kit eliminates the measurement and cutting work while delivering professional results with standard tank dimensions. Experienced reefers with custom tank widths or non-standard configurations will get the most value from cutting their own 1/4-inch cast acrylic sheet stock. The Trigger Systems approach is ideal for those who want a completely tool-free, removable baffle system within a dedicated product ecosystem. Whatever route you choose, investing in the right aquarium sump baffle and acrylic divider setup pays dividends in cleaner water, better microbubble control, and a more stable, efficient filtration system.
Related Reviews & Guides


Aquarium Calcium Reactor for Reef Tanks
Best Saltwater Nano Reef Tank 2026