Last Updated: October 4, 2026
A protein skimmer cup collects dark, concentrated aquarium waste, so it needs regular cleaning to keep foam production steady and odors under control. Learning how to clean a protein skimmer cup correctly also protects the skimmer’s neck, drain fittings, and seals. Done poorly, cleaning can leave behind soap or chemical residue that harms fish, corals, and invertebrates. A rough sponge or metal tool can scratch acrylic, while forcing a brittle drain plug may cause a leak.
The safest method is simple: remove the cup, empty it away from the aquarium, rinse it with warm water, loosen buildup with diluted white vinegar, rinse thoroughly, and reinstall it without detergents. The following routine works for most marine-aquarium skimmer cups, including collection cups with removable lids, necks, drain ports, and silicone O-rings.
As an Amazon Associate we earn from qualifying purchases at no extra cost to you.

Quick answer: Our top pick in 2026 is the Clean bucket or basin — our #1 rated choice. See the full ranked comparison, alternatives and buying advice below.
What You Need
| Item | Why | Optional? |
|---|---|---|
| Clean bucket or basin | Contains dirty water and cleaning solution without using a food-preparation sink | No |
| Warm tap water | Rinses waste and vinegar from the cup | No |
| Plain white vinegar | Breaks down mineral scale and dried organic residue | No, unless the cup only needs a quick rinse |
| Soft bottle brush or dedicated toothbrush | Cleans the neck, lid, drain opening, and seams without gouging plastic | No |
| Microfiber cloth or soft sponge | Wipes exterior grime and fingerprints | No |
| Freshwater test cup or measuring cup | Helps rinse narrow drain channels and fittings | Yes |
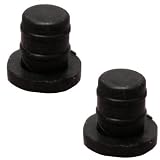
| Replacement drain plug, such as the Reef Octopus Skimmer Cup Replacement Drain Plug 2-Pack | Useful if a plug is cracked, hardened, or no longer seals; listed price is about $10 | Yes |
| Replacement collection cup, such as the Tunze Skimmer Cup Holiday 9004.145 | A replacement option when plastic is damaged or the cup no longer fits; listed price is about $55 | Yes |
Use only plain white vinegar. Do not add dish soap, bleach, glass cleaner, fragrance, disinfectant, or essential oils. Keep cleaning tools dedicated to aquarium use, and avoid abrasive pads, razor blades, and wire brushes.
Step-by-Step
1. Prepare the area and turn off the skimmer (2–5 minutes)
Set a bucket or basin beside the aquarium and place a towel underneath it. If the skimmer cup is connected to a drain hose, close or pinch the hose before removal. Turn off the protein skimmer’s pump and wait several minutes for foam to collapse. This reduces the chance of overflowing the skimmer body when the cup is removed.
Do not unplug the entire aquarium unless your equipment layout requires it. The goal is to stop the skimmer pump, not interrupt filtration, heaters, or circulation unnecessarily.
2. Remove and empty the cup (2–3 minutes)
Lift the cup straight up or twist it according to the manufacturer’s design. Avoid pulling at the neck, drain fitting, or lid. Empty the contents into a household drain or outdoor disposal area, not back into the aquarium. Skimmate contains concentrated organic waste and can create a sudden nutrient spike if returned to the tank.
If the cup is nearly full, move slowly. A typical collection cup may hold roughly 1 to 3 quarts, but capacity varies by skimmer size. Hold the cup over the bucket until it is safely away from the aquarium.
3. Separate removable parts and inspect them (3–5 minutes)
Remove the lid, drain plug, drain hose, silencer components, and any removable neck section that the manufacturer identifies as serviceable. Do not force glued joints or pry apart bonded acrylic panels.
Check for cracks, cloudiness, sharp edges, warped plastic, and brittle rubber. Inspect the drain plug and O-ring especially closely. A plug that feels hard, flattened, split, or loose should be replaced rather than overtightened. Overtightening can distort the fitting or crack the cup.
4. Rinse away loose waste (3–5 minutes)
Rinse every part with warm, not hot, tap water. Very hot water can soften, warp, or stress some acrylic and plastic components. Direct the water into the cup rather than blasting narrow fittings from the side.
Use your fingers or a soft cloth to remove loose sludge. For a cup cleaned every few days, this rinse may be sufficient. If residue remains as a hard brown or white film, continue with a vinegar soak.
5. Soak the cup in diluted vinegar (15–30 minutes)
Mix one part plain white vinegar with one part warm water in the bucket. Place the cup and removable plastic parts in the solution. Keep silicone gaskets and delicate seals submerged only if the manufacturer permits it; otherwise, remove them and wipe them separately with a damp cloth.
For heavy mineral deposits, use undiluted vinegar for up to 30 minutes. Do not leave unknown plastics or rubber parts soaking overnight. Vinegar is mild, but prolonged exposure can affect some seals, coatings, or decorative finishes.
6. Scrub the neck, lid, and fittings (5–10 minutes)
Use a soft bottle brush or dedicated toothbrush to clean the inside of the collection cup, the foam-producing neck, the lid underside, and the drain passage. Use short strokes rather than aggressive pressure. The neck is especially important: a greasy film or thick crust can interfere with the foam head and cause inconsistent collection.
For a narrow drain hole, let vinegar loosen the buildup before brushing. Never push a sharp pin, drill bit, or metal pick through the opening. A flexible plastic straw brush is safer for small passages.
7. Rinse until no vinegar remains (3–5 minutes)
Rinse each part under running water, turning it several times so water reaches seams and channels. Fill the cup once or twice with clean water, swirl it, and empty it. Continue until there is no vinegar smell and the surface no longer feels slick.
Do not use saltwater from the aquarium for the final rinse. It can leave salt deposits as it dries, and it may reintroduce waste into a cleaned cup.
8. Inspect, dry, and reinstall (5–10 minutes)
Wipe the exterior with a clean microfiber cloth and allow removable parts to air-dry briefly. Complete drying is not required before reassembly, but there should be no pooled vinegar solution. Refit the O-ring, drain plug, lid, and hose without lubricants unless the manufacturer specifically recommends an aquarium-safe product.
Install the cup firmly but do not force it. Turn the skimmer back on and watch it for 5 to 10 minutes. Confirm that the cup is seated, the drain fitting is not dripping, and the skimmer is not producing an uncontrolled foam overflow. After cleaning, the foam head may take several minutes to stabilize.
Mistakes to Avoid
- Using dish soap: Even a small residue can enter the aquarium and disrupt foam production or irritate livestock.
- Scrubbing with abrasives: Scuffs and scratches collect residue and can weaken clear plastic.
- Ignoring the drain port: A restricted drain can cause the cup to overflow or defeat an automatic waste-collection setup.
- Cleaning with the skimmer running: Removing the cup while the pump operates can cause splashing, unstable water level, or an overflow.
- Using boiling water: Heat can warp plastic and damage rubber components.
- Forcing stuck parts: Replace a damaged plug or seal rather than applying excessive torque.
- Returning skimmate to the tank: Collected waste belongs down the drain, not in the aquarium.
- Rinsing near aquarium equipment: Keep vinegar and dirty rinse water away from electrical connections and power strips.
How Often
Empty the cup whenever it is about one-half to two-thirds full, or at least once a week for many home aquariums. A heavily stocked reef tank may require emptying every one to three days. A lightly stocked system may go seven to 14 days, but do not wait for the waste to dry into a thick crust.
Give the cup a warm-water rinse weekly or whenever you empty it. Use a vinegar soak about once every four to eight weeks, or sooner when you see mineral scale, stubborn brown film, or a restricted drain. Clean the skimmer neck more often than the cup if foam production changes noticeably.
When to Call a Pro or Replace
Most cup cleaning is a straightforward maintenance task, but seek help from an aquarium professional if the skimmer repeatedly overflows after correct reassembly, the cup will not seat securely, or a crack is spreading near a drain fitting. A professional can also check whether the skimmer body, pump, water level, or air intake—not the cup—is causing unstable foam.
Replace the cup when it has a leak, a permanently warped rim, a cracked neck, cloudy stress damage that obscures the waste level, or a drain fitting that cannot seal. Match the replacement to the exact skimmer model and confirm dimensions before ordering. Replacement drain plugs are usually an inexpensive fix, often around $10 to $20, while a complete cup may cost roughly $40 to $70 or more depending on the brand and model.
FAQ
Can I clean a protein skimmer cup with dish soap?
No. Dish soap can leave surfactants behind even after rinsing, and those residues may affect aquarium livestock and skimmer performance. Use warm water for routine cleaning and plain white vinegar for mineral or organic buildup.
Should I clean the protein skimmer cup with freshwater or saltwater?
Use freshwater for cleaning and the final rinse. Freshwater removes waste without adding salt deposits. Keep the dirty rinse water out of the aquarium, and allow excess water to drain before reinstalling the cup.
Why is my skimmer overflowing after I clean the cup?
The cup may not be seated correctly, the drain hose may be blocked, or vinegar or another residue may remain. Turn off the skimmer, inspect the seal and drain path, rinse the cup again, and restart at a lower collection setting. If overflow continues, check the aquarium water level and skimmer pump.
How long should a protein skimmer cup last?
There is no fixed lifespan. A well-maintained cup can last for years, but frequent exposure to saltwater, ultraviolet light, heat, and physical stress can shorten its life. Replace it when it leaks, cracks, warps, or no longer forms a reliable seal.
Ready to decide? Our #1 pick for 2026 is the Clean bucket or basin.
Live price & availability on Amazon.
Related Reviews & Guides



Fish Gasping at Surface: Oxygen, Ammonia and Temperature
Best 10 Gallon Heater For Fish Tank 2026