Last Updated: October 4, 2026
An aquarium heater looks simple, but poor placement, incorrect wattage, or skipping the acclimation period can put fish at risk quickly. A heater that runs dry may crack; one placed in stagnant water can create hot and cold zones; and a thermostat set too high can overheat a small tank before you notice. The safest approach is to choose a properly sized, fully submersible heater, install it where water circulates, verify the temperature with a separate thermometer, and make changes gradually.
Most tropical freshwater fish do well around 76°F to 80°F, while species-specific needs can vary. Before adding fish or changing a heater setting, confirm the preferred range for the animals in your aquarium. This 2026 guide covers the practical setup process for common adjustable aquarium heaters in freshwater and saltwater tanks.
As an Amazon Associate we earn from qualifying purchases at no extra cost to you.


Quick answer: Our top pick in 2026 is the Adjustable aquarium heater — our #1 rated choice. See the full ranked comparison, alternatives and buying advice below.
What You Need
| Item | Why | Optional? |
|---|---|---|
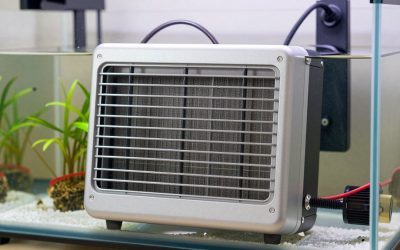
| Adjustable aquarium heater | Maintains a stable water temperature. Choose a fully submersible model rated for your tank size. | No |
| Separate aquarium thermometer | Lets you verify the actual water temperature instead of relying only on the heater dial or display. | No |
| Suction cups or mounting bracket | Secures the heater against the aquarium glass and keeps it away from gravel and decorations. | Usually included |
| Power strip with drip loop clearance | Provides a safe connection point outside the cabinet or splash zone. | No |
| Water conditioner | Needed if you are filling a new freshwater aquarium with tap water. | As needed |
| Small bucket and towel | Useful for water changes, cleaning, and catching drips during installation. | Recommended |
For heater sizing, a common starting point is 2.5 to 5 watts per gallon, depending on how much warmer the aquarium must be than the room. A 25-watt heater may suit a 5-gallon tank, while a 50-watt model is commonly used for a 10-gallon aquarium. A 100-watt heater is often appropriate for 20- to 30-gallon setups. Larger tanks may need 200- or 300-watt heaters, sometimes using two smaller heaters for more even heating and backup protection.
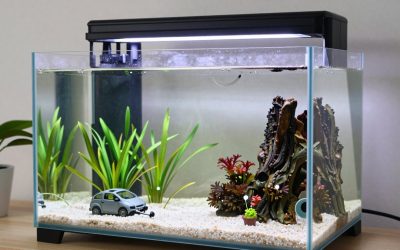
For example, an adjustable 25W/50W/100W/200W/300W heater with a digital thermometer may cost around $14 for an entry-level unit, while a 10-gallon aquarium kit that includes a heater, filter, lighting, and cleaning tool may cost about $110. Always check the heater’s stated tank-size range rather than choosing by wattage alone.
Step-by-Step
1. Choose the correct heater size for your aquarium (5 minutes)
Measure the aquarium’s actual water volume, not just its advertised capacity. Gravel, rocks, wood, and a lower water line can reduce a nominal 10-gallon tank to roughly 8 or 9 gallons of water. Then consider room temperature. If your home stays near 72°F and your fish need 78°F water, a standard heater sized for the tank is usually sufficient. If the aquarium sits in a cold basement, near a drafty window, or in a room that falls below 65°F overnight, use a heater toward the upper end of the manufacturer’s recommended range.
A heater that is too small may run constantly and still fail to maintain temperature. A heater that is dramatically oversized can heat a small tank too quickly if its thermostat sticks on. For nano tanks under 10 gallons, choose a heater specifically designed for small aquariums rather than installing a large 100-watt unit.
2. Inspect the heater before it goes in the tank (3 minutes)
Check the heater tube, cord, plug, suction cups, and temperature control for cracks, loose pieces, or corrosion. Do not use a heater with damaged glass, a split cord, missing seals, or water inside a display screen. Confirm whether the model is fully submersible or must remain partly above the waterline. “Submersible” does not always mean every portion can be submerged, so follow the water-level markings on the heater.
Make sure the tank is filled to its normal operating level before positioning the heater. Never plug in a heater while it is outside the aquarium or while the heating element is exposed to air.
3. Mount the heater near water flow (5 minutes)
Attach the heater vertically or at a slight diagonal against the back or side glass, using the supplied suction cups. Leave at least 1 inch of clearance between the heater and the substrate, rocks, artificial plants, or tank walls that could trap heat. A horizontal position low on the back wall can also work well if the manufacturer permits full submersion.
Place the heater close to the filter outflow or another area with steady circulation, but do not wedge it directly inside the filter compartment unless the filter and heater instructions specifically allow it. Moving water distributes heat throughout the aquarium and helps prevent a warm pocket near the heater.
4. Let the heater acclimate to the water (15 to 30 minutes)
Once the heater is mounted, keep it unplugged for at least 15 minutes; 30 minutes is safer if the heater has been stored in a much colder or warmer location. This pause allows the glass or casing to equalize with the aquarium water temperature. Plugging in a cold heater immediately after submersion can stress the heater tube and may contribute to cracking.
During this time, place the separate thermometer on the opposite side of the aquarium from the heater. That location gives a more useful reading of the tank’s overall temperature than a thermometer placed directly beside the heating element.
5. Set a conservative starting temperature (2 minutes)
Set the heater to the middle of your fish’s recommended range. For many community tropical fish, 78°F is a sensible initial target. Avoid turning the dial to its maximum setting in an attempt to heat the tank faster. Aquarium water should warm gradually, generally no more than about 1°F to 2°F per hour for a typical home aquarium.
If you are setting up an empty new tank, you can allow it to reach temperature before introducing fish. If fish are already in the aquarium, make adjustments in small increments—usually 1°F at a time—with several hours between changes.
6. Plug it in safely and create a drip loop (3 minutes)
Plug the heater into a grounded outlet or a quality power strip positioned higher than the aquarium water level when possible. Form a drip loop: let the cord hang below the outlet before it rises to the plug. If water travels down the cord, it will drip from the low point instead of reaching the electrical outlet.
Keep power strips off the floor and away from aquarium splashes. If the heater has an indicator light, it may turn on while heating and switch off when the thermostat reaches its set point. That light is helpful, but it is not a replacement for checking the thermometer.
7. Verify and fine-tune the temperature (12 to 24 hours)
Wait at least 12 hours, then read the separate thermometer. Compare that reading with the heater setting or built-in display. It is normal for a basic dial heater to be off by a few degrees. Adjust the dial in small increments, then wait several more hours before checking again.
Check the temperature in the morning and evening for the first two days. A stable reading within about 1°F of your target is a good sign. If one side of the tank is consistently 2°F or more warmer than the other, improve circulation, reposition the heater, or consider a second heater for a larger aquarium.
Mistakes to Avoid
- Plugging in a dry heater: Always submerge it to the required level and allow it to sit in the water before connecting power.
- Trusting only the heater dial: Use a separate digital or glass thermometer to confirm actual water temperature.
- Placing the heater in still water: Position it near filter flow so warm water circulates through the tank.
- Choosing by price alone: A low-cost heater can be suitable, but it must be correctly rated for your aquarium volume and have intact safety features.
- Turning the temperature up too fast: Rapid changes can stress fish even when the final temperature is appropriate.
- Leaving the heater on during water changes: Unplug it before draining water, then wait 15 minutes after refilling before plugging it back in.
- Hiding it behind packed décor: Keep open water around the heater so heat can dissipate properly.
How Often
Check the thermometer daily during the first week after installation, after a major water change, and whenever room temperatures shift significantly. Once the aquarium is stable, check temperature at least every few days and observe the heater indicator during routine feeding.
Inspect the heater, suction cups, cord, and plug monthly. During regular maintenance, wipe algae from the exterior only after unplugging the heater and allowing it to cool in the aquarium water for 15 minutes. Replace hardened suction cups if the heater begins to slide or detach. Test temperature accuracy every few months by comparing the aquarium thermometer with a second reliable thermometer.
When to Call a Pro or Replace
Replace the heater immediately if you see a cracked tube, condensation inside the unit, frayed wiring, corrosion at the plug, repeated tripping of an outlet, or temperatures that rise or fall unpredictably. Do not attempt to repair a sealed aquarium heater at home.
Seek help from an experienced aquarium service professional or aquatic veterinarian if fish are gasping, lying on the bottom, showing sudden distress, or if the tank temperature has climbed above the safe range for the species. In an overheating event, unplug the heater first. Then lower the temperature slowly with increased surface agitation, a partial water change using properly conditioned water close to the target temperature, or floating sealed bags of ice in the tank. Do not dump ice directly into the aquarium.
FAQ
What temperature should I set my aquarium heater to?
For many tropical community fish, 78°F is a practical starting point. However, always use the recommended range for your specific fish, shrimp, turtle, or saltwater livestock. Cold-water species may not need a heater at all.
Can I put an aquarium heater horizontally?
Many fully submersible models can be mounted horizontally or diagonally, often low on the back wall. Check the manufacturer’s instructions first. Horizontal placement can improve heat distribution, especially when positioned near filter flow.
How long does it take an aquarium heater to warm water?
A small aquarium may warm by a few degrees within several hours, while a larger tank can take 12 to 24 hours to stabilize. Room temperature, tank size, heater wattage, lid coverage, and circulation all affect the timing.
Should I turn off my aquarium heater at night?
No. Most tropical aquariums need stable temperatures around the clock. Leave the heater plugged in so its thermostat can cycle as needed. Turn it off only for water changes, cleaning, relocation, or when troubleshooting a suspected malfunction.
Ready to decide? Our #1 pick for 2026 is the Adjustable aquarium heater.
Live price & availability on Amazon.
Related Reviews & Guides
6 Best Aquarium Glass Cleaner Magnets 2026
How to Fix a Noisy Aquarium Air Pump (2026): Step-by-Step