Last Updated: October 21, 2026
A large tank rewards doing things in the right order, from a level stand to a stable, cycled system, rather than rushing to add fish. This best 75 gallon aquarium kit setup checklist walks the dependencies step by step, so each stage is ready before the next, and a settling period is never mistaken for a finished nitrogen cycle.
As an Amazon Associate we earn from qualifying purchases.
By David Nguyen
The 75 Gallon Setup Checklist
The setup follows a strict order, because each stage depends on the one before it. Start with the site and a level, load-rated stand, add substrate and decor, install the equipment, then fill, condition and start it. The table below sets out the sequence, and the sections after it adjust the plan for each tank type.
| Stage | Key Action | Result | Watch Out |
|---|---|---|---|
| Site and stand | Level a load-rated stand on a sound floor | Stable base for a heavy tank | ~750 lb is a planning estimate, not exact load |
| Substrate and decor | Add rinsed substrate and hardscape | Aquascape set before any water | Rearranging after filling is difficult |
| Install equipment | Fit filter, heater and light, unpowered | Life support placed, ready to run | 75 gal does not always mean a 300W heater |
| Fill and start | Fill, dechlorinate, then power equipment | System running and warming up | 48 hours settling is not a finished cycle |
Site and Stand First
Begin with where the tank will live and what it stands on, since everything else rests on this. Choose a spot on a sound floor away from direct sun and drafts, and set a level, load-rated stand, because a filled 75 is heavy and a stable base is the foundation of the whole setup that follows.
Plan the weight around a rough estimate of about ten pounds per gallon, giving a loaded figure near 750 pounds, but treat that as a planning number rather than an exact structural load. Confirm the stand’s own rating and the floor’s suitability instead of a general figure to judge whether the site can bear it.
Substrate and Decor Next
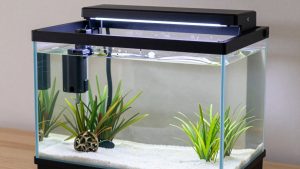
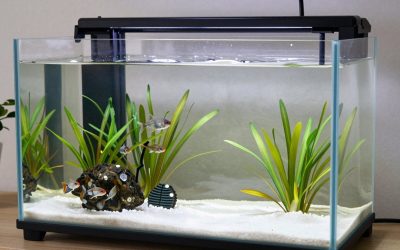
With the stand ready, add the substrate and hardscape before any water goes in. Rinse substrate to reduce cloudiness, arrange rocks and decor on the tank base, and set the layout you want, since building the aquascape in an empty tank is far easier than reaching into a full one later.
Getting the decor in at this stage avoids disturbing a filled, running tank afterwards. Rearranging hardscape once the water and equipment are in place is messy and can cloud the tank, so treat this as the moment to finalise the layout rather than something to revisit once fish are already present.
Install the Equipment
Next, fit the life support while the tank is still empty and unpowered. Position the filter, heater and light, route cables with drip loops, and check placement, but do not switch anything on yet, since heaters and pumps should run only once the tank is filled to their required water level.
Size the heater to the tank and room rather than a fixed figure, because a 75 does not always call for a 300-watt unit. Aqueon guidance links wattage to how far above room temperature you must hold the water, so choose capacity from your conditions instead of assuming one standard heater fits every 75.
Fill, Condition and Start
Finally, fill the tank, condition the water and power the equipment. Add dechlorinated or conditioned water to the correct level, then start the filter and heater and let the system stabilise, checking for leaks, correct flow and a temperature settling into the range your intended livestock will eventually need.
Let the tank run and settle before thinking about fish, and do not treat a short wait as a completed cycle. A settling period of at least 48 hours confirms the equipment works, but it is not proof the nitrogen cycle is finished, which takes considerably longer to establish safely for any livestock.
Adjust for Your Situation
The core sequence holds for any 75, but the details shift with the tank type. Tropical, coldwater, planted and saltwater setups each change the equipment choices and the readiness checks within the same ordered checklist, so adapt the stages below rather than following a single generic plan for every tank.
Tropical Freshwater
A tropical setup leans on a heater sized to hold a warm, stable range above room temperature. Match the wattage to how cold the room runs rather than defaulting to a fixed figure, and confirm the heater brings the tank into the tropical range steadily before considering any livestock for the system.
Otherwise the ordered checklist applies unchanged, from the stand to the settling period. The key tropical adjustment is heating capacity suited to your room, so the tank reliably holds temperature, while the filtration, filling and cycling stages follow the same sequence as any other freshwater 75 would.
Coldwater
A coldwater setup, such as goldfish, may need little or no heating, since these fish prefer cooler water than tropical species. Rather than assuming a heater and a tropical range, confirm the target temperature for your fish, and use a heater only to hold a stable, appropriate range if the room runs too cold.
The rest of the checklist stays the same, with particular attention to filtration for high-waste coldwater fish. The adjustment is to drop the tropical heating assumption and size any heater, if used, to the fish’s cooler range, while keeping the ordered filling and cycling stages exactly as before.
Planted
A planted 75 adds lighting and substrate choices to the sequence. Select a light suited to the plants you intend, since a bundled or display LED may not provide adequate growth lighting, and choose or supplement substrate for plants before filling, as changing it later disturbs both roots and the aquascape.
Insert these choices at the substrate and equipment stages rather than reordering the checklist. The planted adjustment is real plant lighting and a suitable substrate planned up front, after which the filling, starting and cycling stages proceed in the same order as any other freshwater setup would.
Saltwater
A saltwater setup expands the equipment and readiness stages considerably. Add marine-specific gear such as circulation, rock and sand, mix saltwater to the correct salinity before filling, and plan for a longer maturation than a freshwater tank, since a reef system takes time to become biologically ready.
The ordered logic still holds, but each stage carries more marine detail and a longer timeline. The adjustment is marine equipment, salinity preparation and patience, so treat the settling and cycling period as an extended stage rather than the brief wait a simple freshwater tank might allow before stocking.
Frequently Asked Questions
Setup questions focus on what a short wait proves, when to change water, how to size a heater, and when fish can go in. These answers keep the checklist’s order intact, since the sequence from stand to biological readiness matters more than any single step, and settling is never the same as a completed cycle.
Does 48 Hours Mean the Tank Is Cycled?
No. A settling period of at least 48 hours lets the equipment run, the temperature stabilise and any cloudiness clear, but it is not proof the nitrogen cycle is complete. Establishing the beneficial bacteria that process fish waste takes considerably longer than two days in a new setup like this.
So treat the 48-hour mark as equipment readiness, not biological readiness. The tank is ready for fish only once the cycle has genuinely established, which you confirm through testing rather than the clock, making patience after the settling period one of the most important parts of the whole checklist.
When Should I Change Water?
During setup, the priority is conditioning the initial fill correctly rather than changing it, but once the tank is running and stocked, regular partial water changes become routine. Their frequency depends on the livestock and filtration, so set a schedule once fish are in rather than during the empty setup stages.
In a cycling tank, water changes may be used to manage parameters as the system matures, guided by testing. Let readings, not a fixed calendar, drive the timing, and treat water changes as an ongoing part of stable operation that follows the setup checklist rather than forming part of its early physical stages.
How Do I Size the Heater?
Size the heater to the tank volume and how far above room temperature you must hold the water, not to a single default. Aqueon guidance ties wattage to the temperature rise needed, so a 75 might use a smaller heater in a warm room and a larger one, or a second unit, in a cooler room.
Because of that, a 75 does not automatically require a 300-watt heater. Assess your room’s typical temperature and your target range, then choose capacity accordingly, and consider that two heaters can share the load on a large tank, giving more even heating and a margin should one unit ever fail.
When Can I Add Fish?
Add fish only after the tank is not just running but biologically ready, which comes well after the settling period. Confirm through testing that the cycle has established and parameters are stable, since a system that looks finished after 48 hours is usually far from ready to support livestock safely yet.
Introduce livestock gradually once the tank is genuinely cycled, rather than all at once. Stocking slowly lets the biological filtration keep pace with the growing waste load, which is the final stage of the checklist and the one most worth the patience the earlier steps have set up carefully.
Final Thoughts
This best 75 gallon aquarium kit setup checklist works because it respects the order: support, equipment, water, stable operation, biological readiness, then livestock. Size the heater to your room, not a fixed figure, treat 750 pounds as a planning estimate, and never mistake a 48-hour wait for a finished cycle.

Best Aquarium Rack for Beginners: Easy and Reliable Picks
Common Mistakes When Buying a Rimless Aquarium: Top-Rated