Last Updated: October 21, 2026
A good start happens before the water goes in, and this all in one saltwater tank setup checklist walks the order that keeps a nano stable: confirm what the system truly includes, match the light and flow to what you want to keep, then line up the gear an AIO does not always come with.
As an Amazon Associate we earn from qualifying purchases.
By David Nguyen
How to Set Up an All-in-One Saltwater Tank
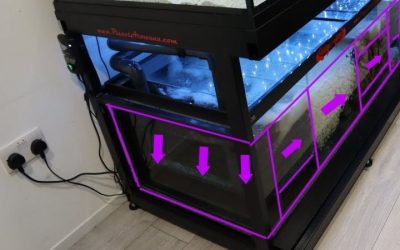
An all-in-one hides its filtration in rear chambers, which is convenient but easy to misread. The label rarely lists everything you actually need, so the checklist below moves from what the tank includes to what you must add. Work through it in order and the build stays calm rather than reactive.
| Input | Result | Note | Exception |
|---|---|---|---|
| Tank with built-in filtration | Display plus rear chambers ready | System volume is not display volume | Confirm the SKU’s real capacity |
| Reef-capable light | Coral potential if PAR suits | Watts and Kelvin are not PAR | Check PAR at your depth |
| Return pump and flow | Basic circulation | Rated LPH is return, not total flow | Add a powerhead for corals |
| Heater, RODI, salt, ATO | Stable parameters | Not always in the box | Budget these separately |
Confirm What the System Includes
Start by reading the exact SKU, not the category. An all-in-one bundles filtration into the tank, but what else it ships with varies widely between models. Two tanks called AIO can include very different gear, so confirm the contents before assuming anything is covered.
Note also that system volume is not display volume. The rear chambers hold water that never shows in the display, so a tank’s headline gallons overstate the swimming space. Knowing the real display volume matters for stocking, and knowing total volume matters for dosing and stability.
Match the Light to What You Keep
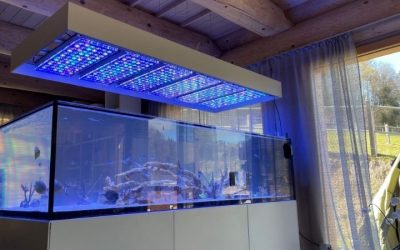
The stock light decides what corals are possible, and specs mislead here. Watts, lumens and Kelvin describe the fixture, not the usable light corals need, which is measured as PAR. A bright-looking light can still fall short for anything beyond the hardiest corals.
So match the light to your goal, not its wattage. A fish-only tank needs little, soft corals more, and LPS more again, with PAR at the coral’s depth being the honest measure. If the stock light is weak, budget an upgrade rather than assuming the AIO covers it.
Plan Flow Beyond the Return Pump
The built-in return pump moves water through the filtration, but its rated flow is return flow, not the total circulation a reef needs. A number on the box describes the pump, not the movement across the rock, so do not read it as enough flow for corals. Read it as filtration flow, then plan real circulation on top.
Plan additional flow for anything beyond fish. A small powerhead spreads circulation the return alone cannot, keeping detritus moving and corals fed. Size it to the tank, since too much flow in a nano is as unhelpful as too little, and the goal is gentle, even movement.
Line Up the Missing Essentials
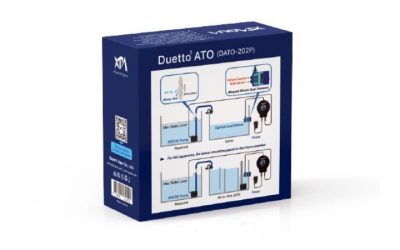
An AIO simplifies filtration but rarely includes everything. A heater, RODI water, marine salt and often an auto top-off are needed for stable parameters, and many kits leave some of these out. Treat the tank as the core, not the complete system, when you budget.
An auto top-off matters more in a nano, where evaporation swings salinity fast in a small volume. Lining up these essentials before launch prevents the scramble of a tank running without stable conditions. Buy them alongside the tank so the setup is ready on day one.
Adjust for Your Situation
The base checklist suits most nano builds, but your goal and space shift a few items. Whether you want corals, keep the tank in a small room, or plan to grow, the adjustments below tune the list. Take the baseline, then move items up or down for the tank you actually intend to run.
Fish-Only Keeps It Simple
A fish-only tank needs the least. The stock light is usually fine, extra flow is optional, and the priority is stable salinity and temperature rather than PAR. You can run close to the base checklist without the coral-driven upgrades. Even so, salinity and heat still need steady, boring attention.
Even so, the essentials still apply. A heater, RODI water, salt and an auto top-off keep a fish-only nano stable, and system volume still differs from display volume for stocking. Simple does not mean skipping the basics that hold parameters steady. Skipping them is the quiet cause of most early nano trouble.
Corals Raise the Light and Flow
Wanting corals changes two items sharply. The light must deliver the PAR your corals need at their depth, and flow must exceed what the return pump alone provides, so both usually mean additions to the stock tank. Plan these from the start rather than retrofitting.
Match the upgrades to the coral type, since softies, LPS and SPS ask for progressively more. Checking PAR at depth and adding measured flow are the two steps that most often decide whether corals thrive, so treat them as core for any reef, not optional extras.
Small Rooms Value Quiet and ATO
In a small room, noise and maintenance frequency matter more. A quiet return pump and a reliable auto top-off reduce both the sound and the daily fuss, which counts when the tank sits near where you live or work. Prioritize these comfort items in the build. A tank you barely hear earns its keep in a shared room.
An ATO is especially useful here, since a nano evaporates quickly and manual top-offs become a daily chore. Setting it up early keeps salinity stable and the routine light, so the tank fits the space rather than demanding constant attention in it. Automating top-offs is the single biggest ease-of-life win here.
Growing Later Means Planning Now
If you expect to add corals or upgrade, plan the checklist around that future. Choosing a slightly larger nano, a light with headroom, and space for a powerhead saves replacing gear soon after launch. A little foresight is cheaper than a quick re-buy. Buying once for the plan beats buying twice for the surprise.
Confirm the tank and stand suit the plan too, since a matching stand supports the load a filled tank adds. Building with growth in mind keeps the setup coherent, so each addition slots in rather than forcing a rethink of the whole system later. A wobble under a filled nano is a risk not worth taking.
Frequently Asked Questions
Setup questions cluster around what an AIO includes, whether the stock light grows corals, how much flow to add, and what to buy separately. Each answer gives the practical rule first, then the exception that adjusts it for your goal and space. Read them in order and the build stops feeling improvised.
Does an all-in-one include everything I need?
Not usually. An AIO bundles filtration into the tank, but a heater, RODI water, salt and often an auto top-off are separate, and contents vary by model. Read the exact SKU rather than the AIO label, since two tanks with the same category can ship very differently.
Treat the tank as the core of the system, not the whole of it. Listing what it includes against what a stable reef needs shows the gaps before launch, so you can budget the essentials and avoid running the tank without stable parameters on day one. That gap list is the difference between ready and half-ready.
Will the stock light grow corals?
It depends on the model and the coral, and specs alone will not tell you. Watts, lumens and Kelvin describe the fixture, not the PAR corals actually use, so a bright stock light can still fall short for anything past the hardiest species. Check PAR at depth, not wattage.
For fish or the toughest softies a stock light may suffice, while LPS and SPS usually need more. Match the light to your coral goal and be ready to upgrade, since assuming the included fixture covers corals is a common and costly setup mistake. Assuming otherwise is how a first reef stalls at the light.
How much flow does a nano reef need?
More than the return pump provides, but gently. The built-in return handles filtration, yet its rated LPH is return flow, not the total circulation corals want, so most reef nanos add a small powerhead. The aim is even movement across the rock, not a torrent. Return flow and reef flow are two different jobs entirely.
Size the extra flow to the tank, since a nano over-powered with flow stresses corals as much as too little. Start modest, watch how detritus and corals respond, and adjust, treating flow as something to tune rather than a single number to hit. Watch the corals, not the spec sheet, to find the right level.
What should I buy separately for an AIO?
Commonly a heater, RODI water, marine salt and an auto top-off, plus a powerhead if you want corals and a light upgrade if the stock one is weak. Exactly which depends on the SKU, so compare its contents to the checklist before ordering the rest. Match the list to your goal so nothing essential is missed.
An auto top-off deserves priority in a nano, where fast evaporation swings salinity in a small volume. Lining these up alongside the tank means the system is complete at launch, rather than discovering a missing essential once the water is already in. A complete launch beats a scramble for a missing piece later.
Final Thoughts
Used in order, this all in one saltwater tank setup checklist keeps a build calm: confirm the exact SKU and its real volume, match light and flow to what you keep, and line up the heater, RODI, salt and top-off an AIO may omit. Adjust for corals, space and growth, and the tank starts stable.

Aquarium Hydrometer Salinity Refractometer

Saltwater Aquarium Equipment Checklist: Numbers and Cost